
A Fire hook is designed for working with campfires where large or uneven logs are normally seen. In contrast, your typical household fire uses split logs that are mostly all the same size. Below are the steps we took to make this Fire hook and a few descriptions on the actual steps.
It is very important to remember that this is dangerous work. The Fire is extremely hot, working about a thousand degrees Fahrenheit on the surface and close to eight-thousand degrees Fahrenheit at the core. The shop ‘s ambient temperature was about seventy degrees Fahrenheit before we started the fire, at the height of working we had reached just over a hundred degrees. So it is very important to pay attention to not only those things that are on fire but also your own hydration.
Before we start a project we need to make sure all the tools we have are in good working order. This means checking the hammers for loose heads or cracks in the handles, oiling the various tongs, pliers and vises. For the safety equipment we make sure our gloves are not damaged and that our apron hasn’t been compromised. We also check our fire extinguishers at least once a week to make sure they are fully charged and ready for use.
Next we compare the order or project to the available metal stock. Each project has unique requirements that determine which of the types of steel or metal we will use. For example, the Fire hook is going to be used around a campfire and should be made from steel with a higher carbon content (more carbon generally means a stronger steel) than a dinner bell.
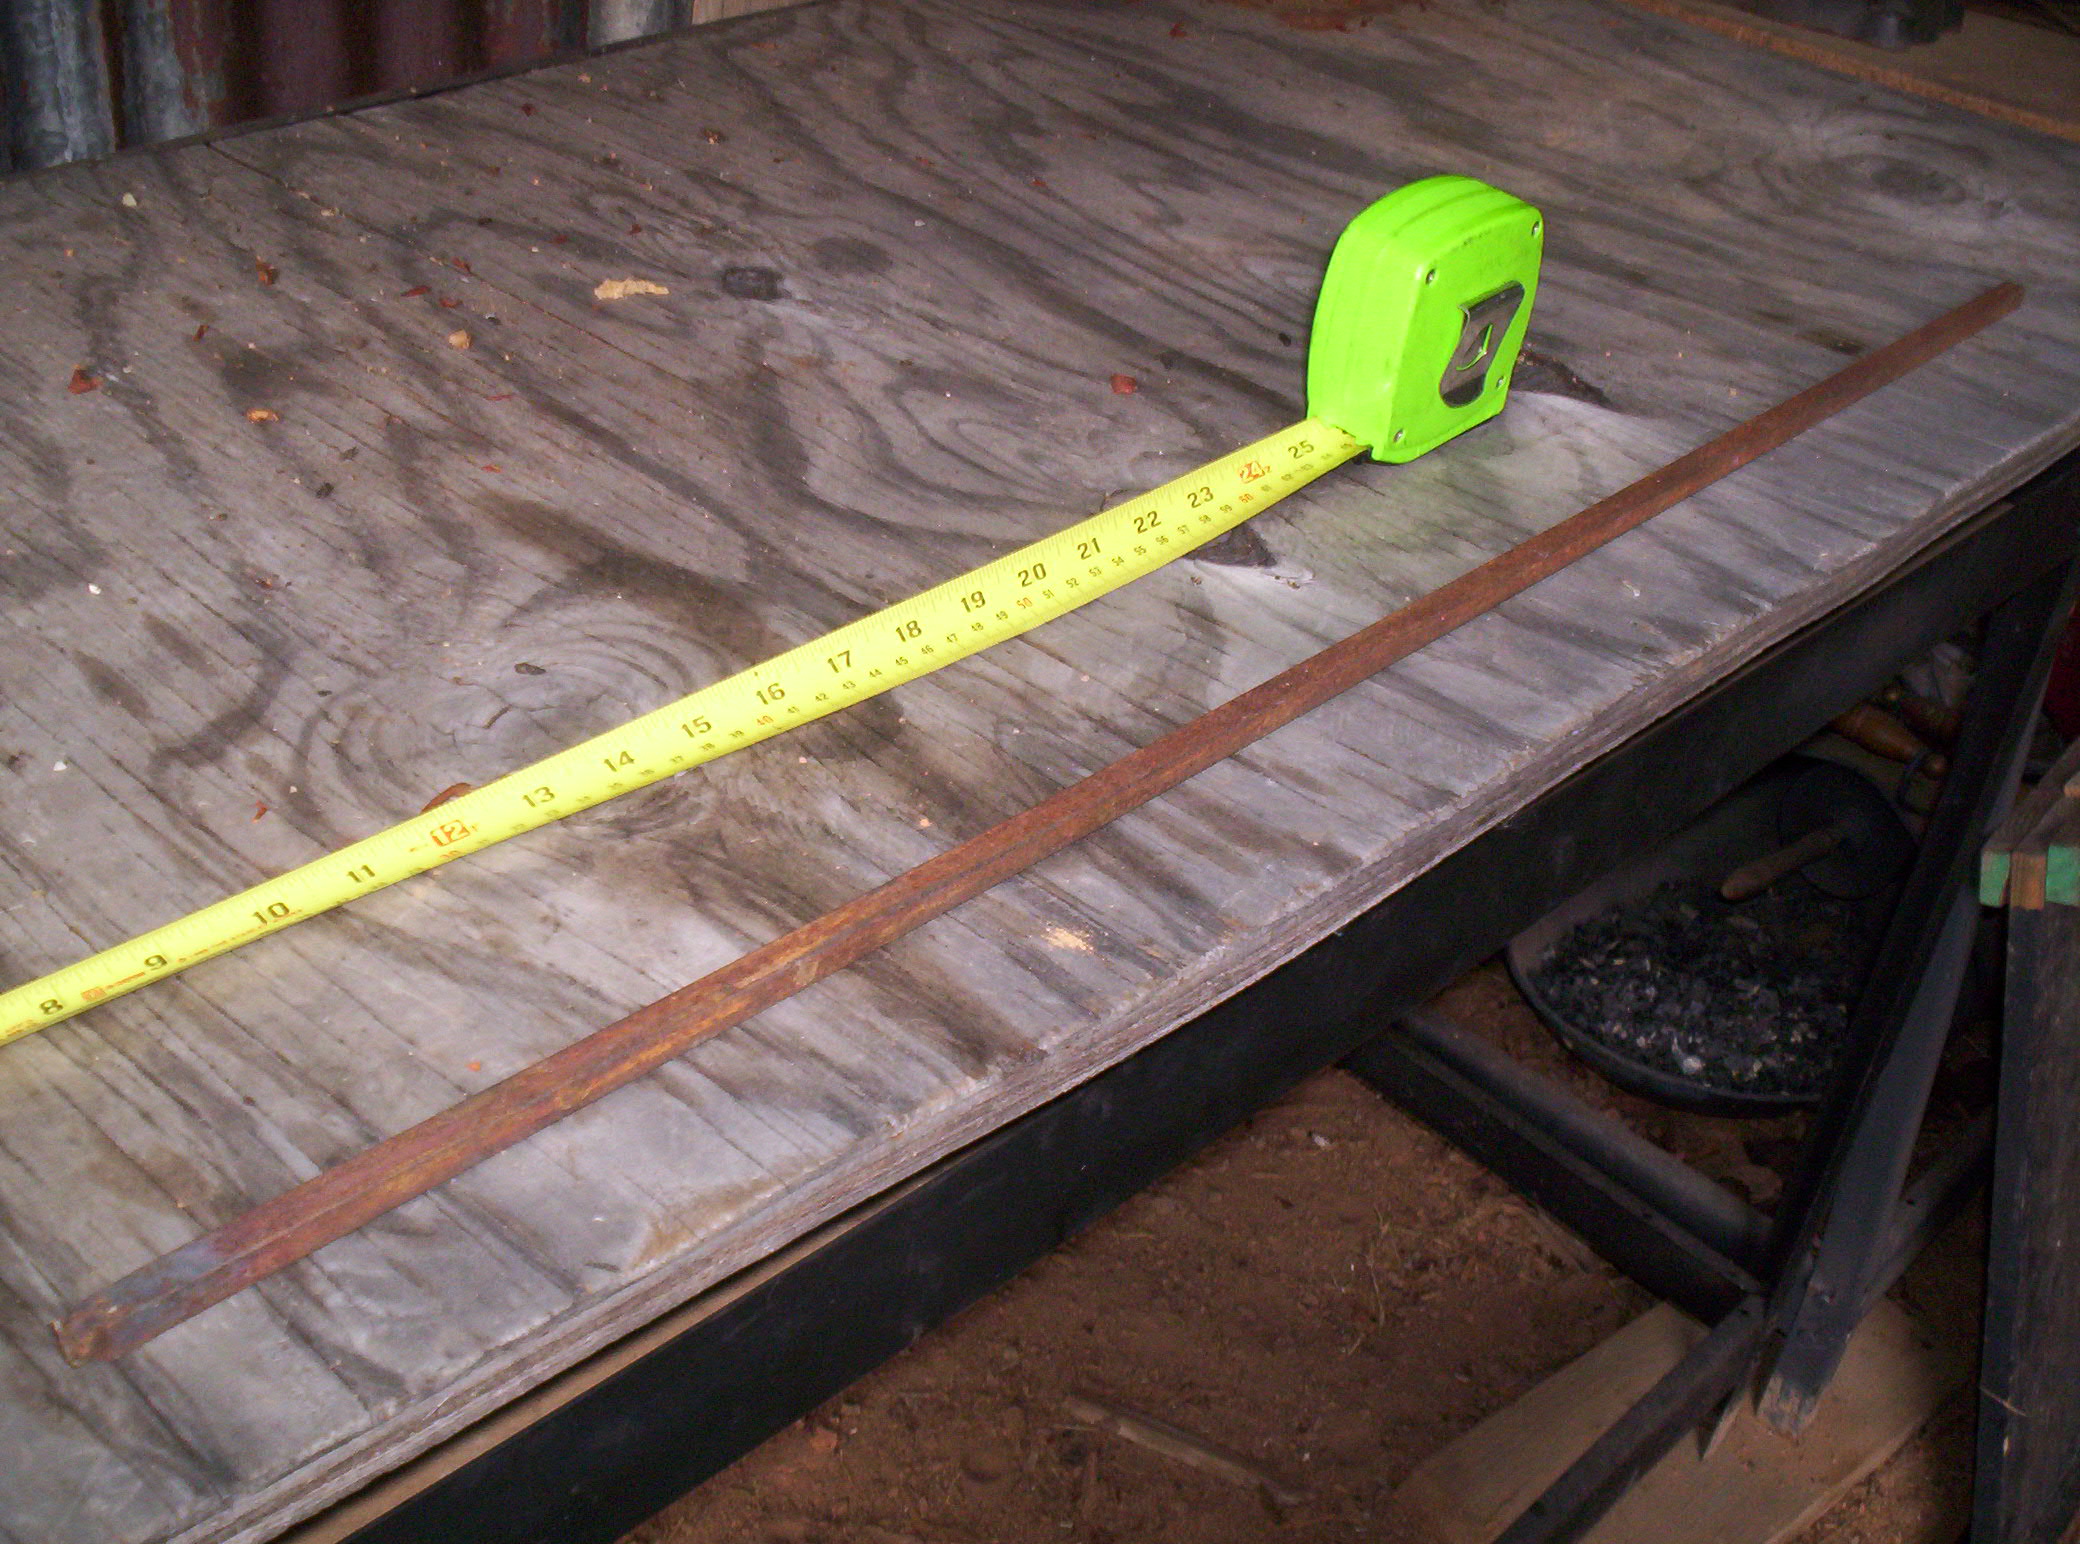
Once we have the type of stock we would select the shape and size. For the fire hooks I use 3/8 inch square stock. This size just feels right to me, if you look at it there is good thickness to the stock which keeps the heat from the fire from traveling quickly to your handle and it gives a feeling of strength to the overall hook. Lastly we need to determine how much stock we will need to use.
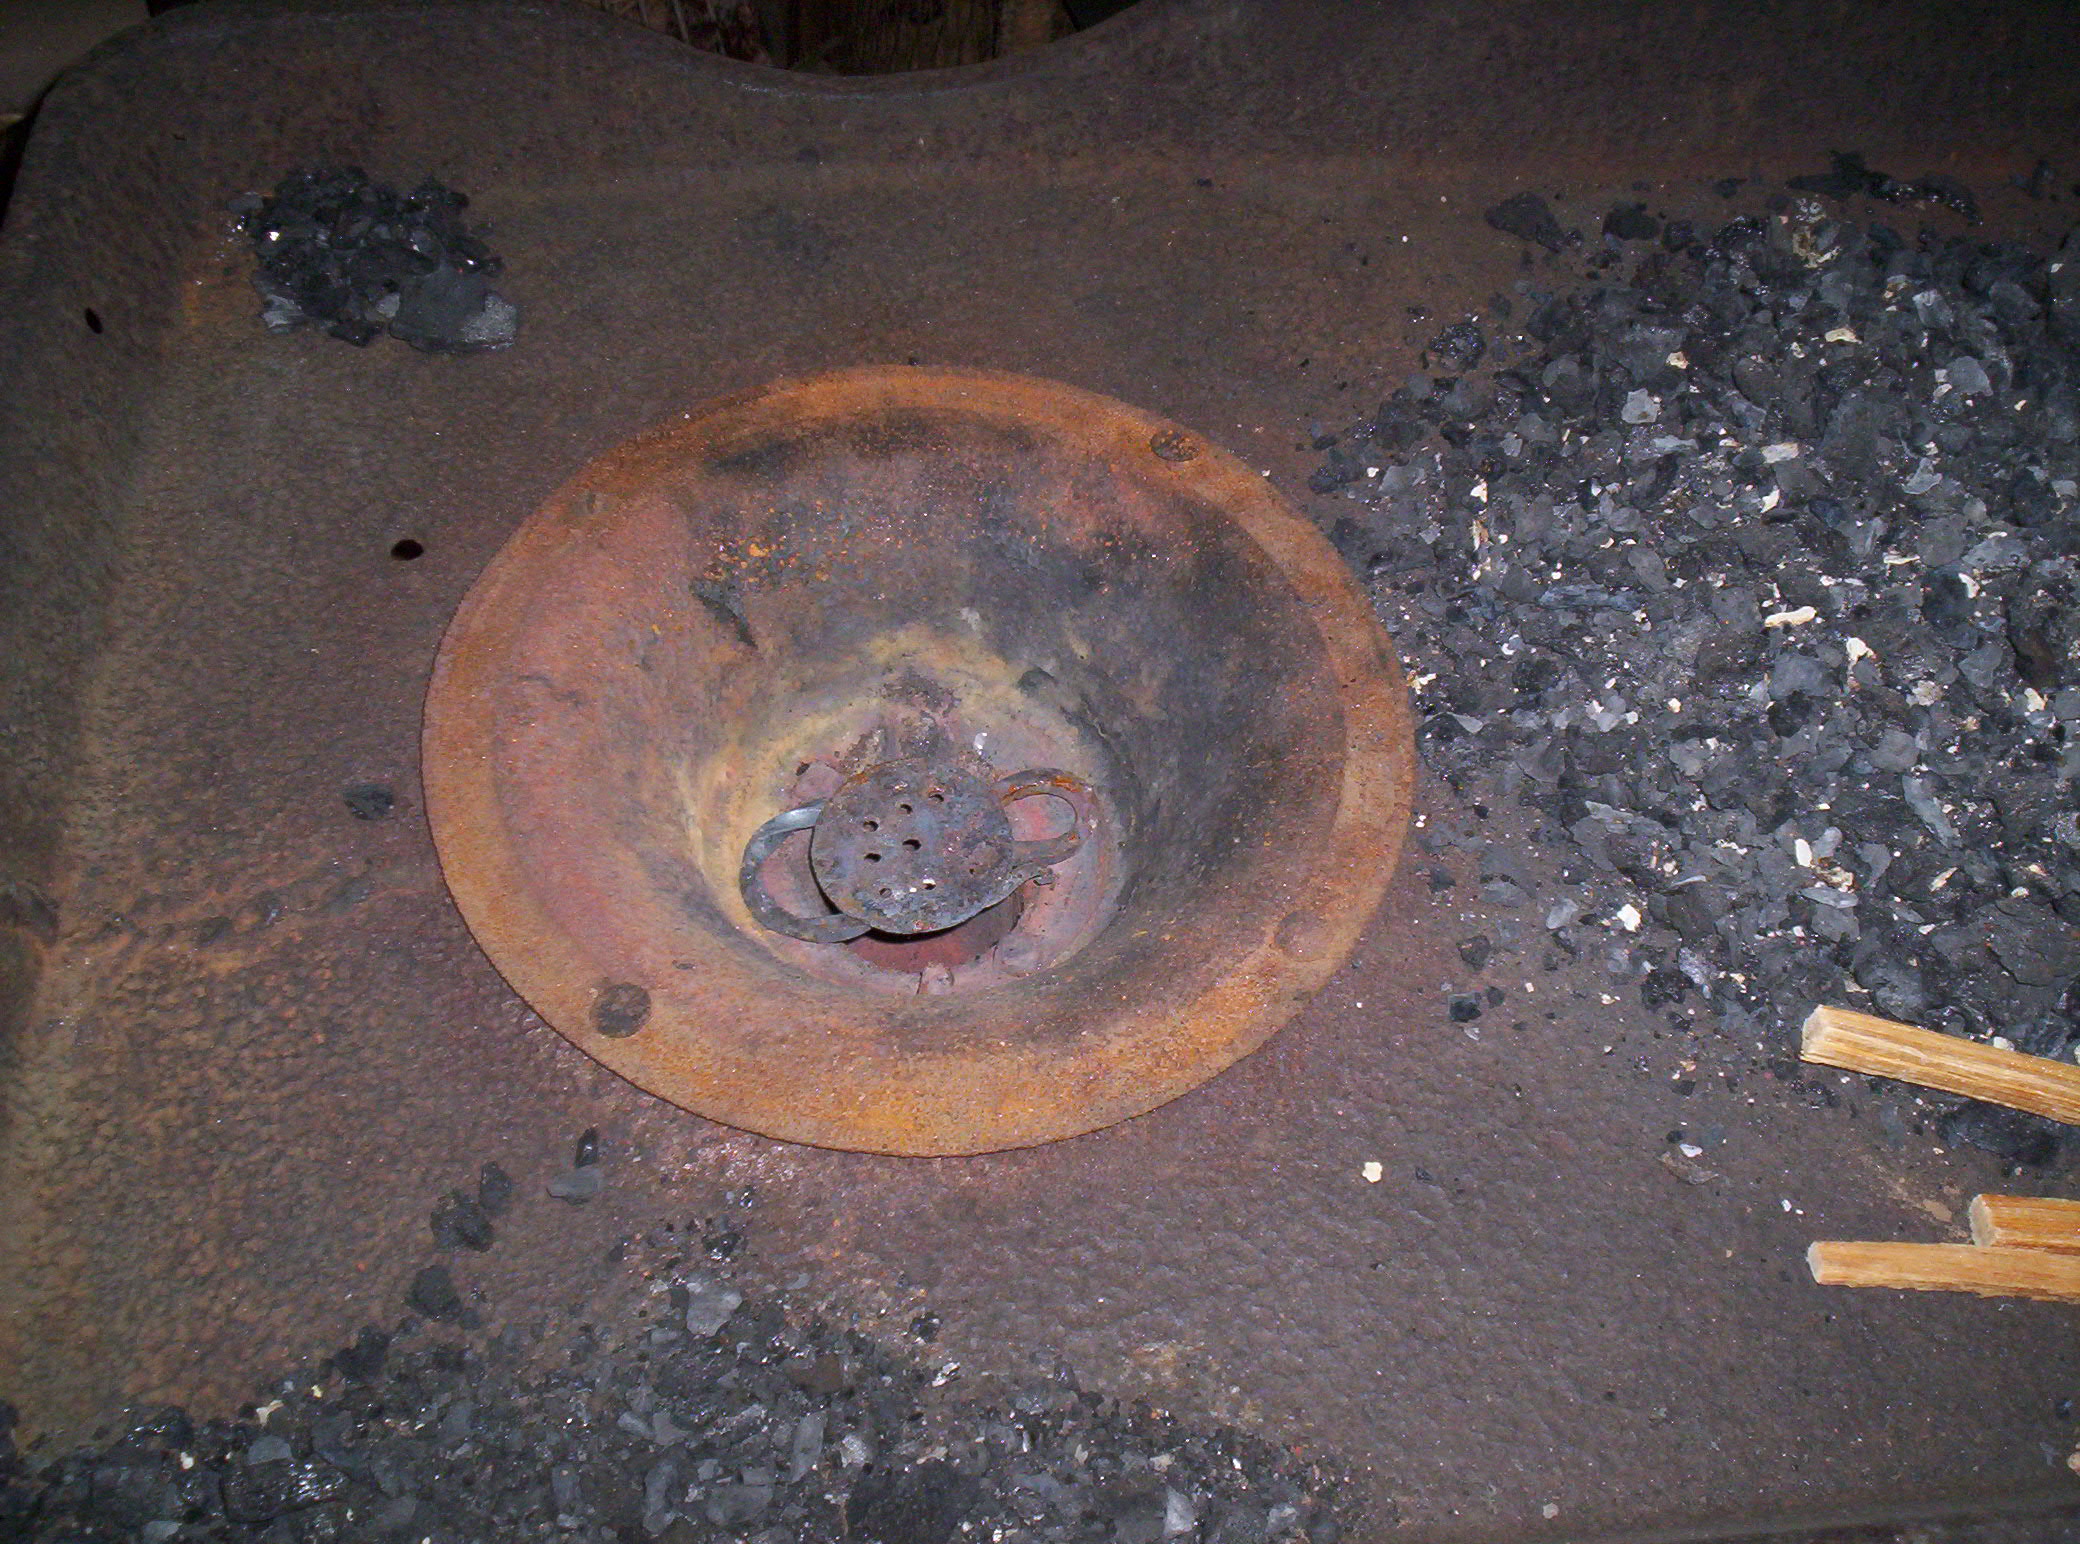
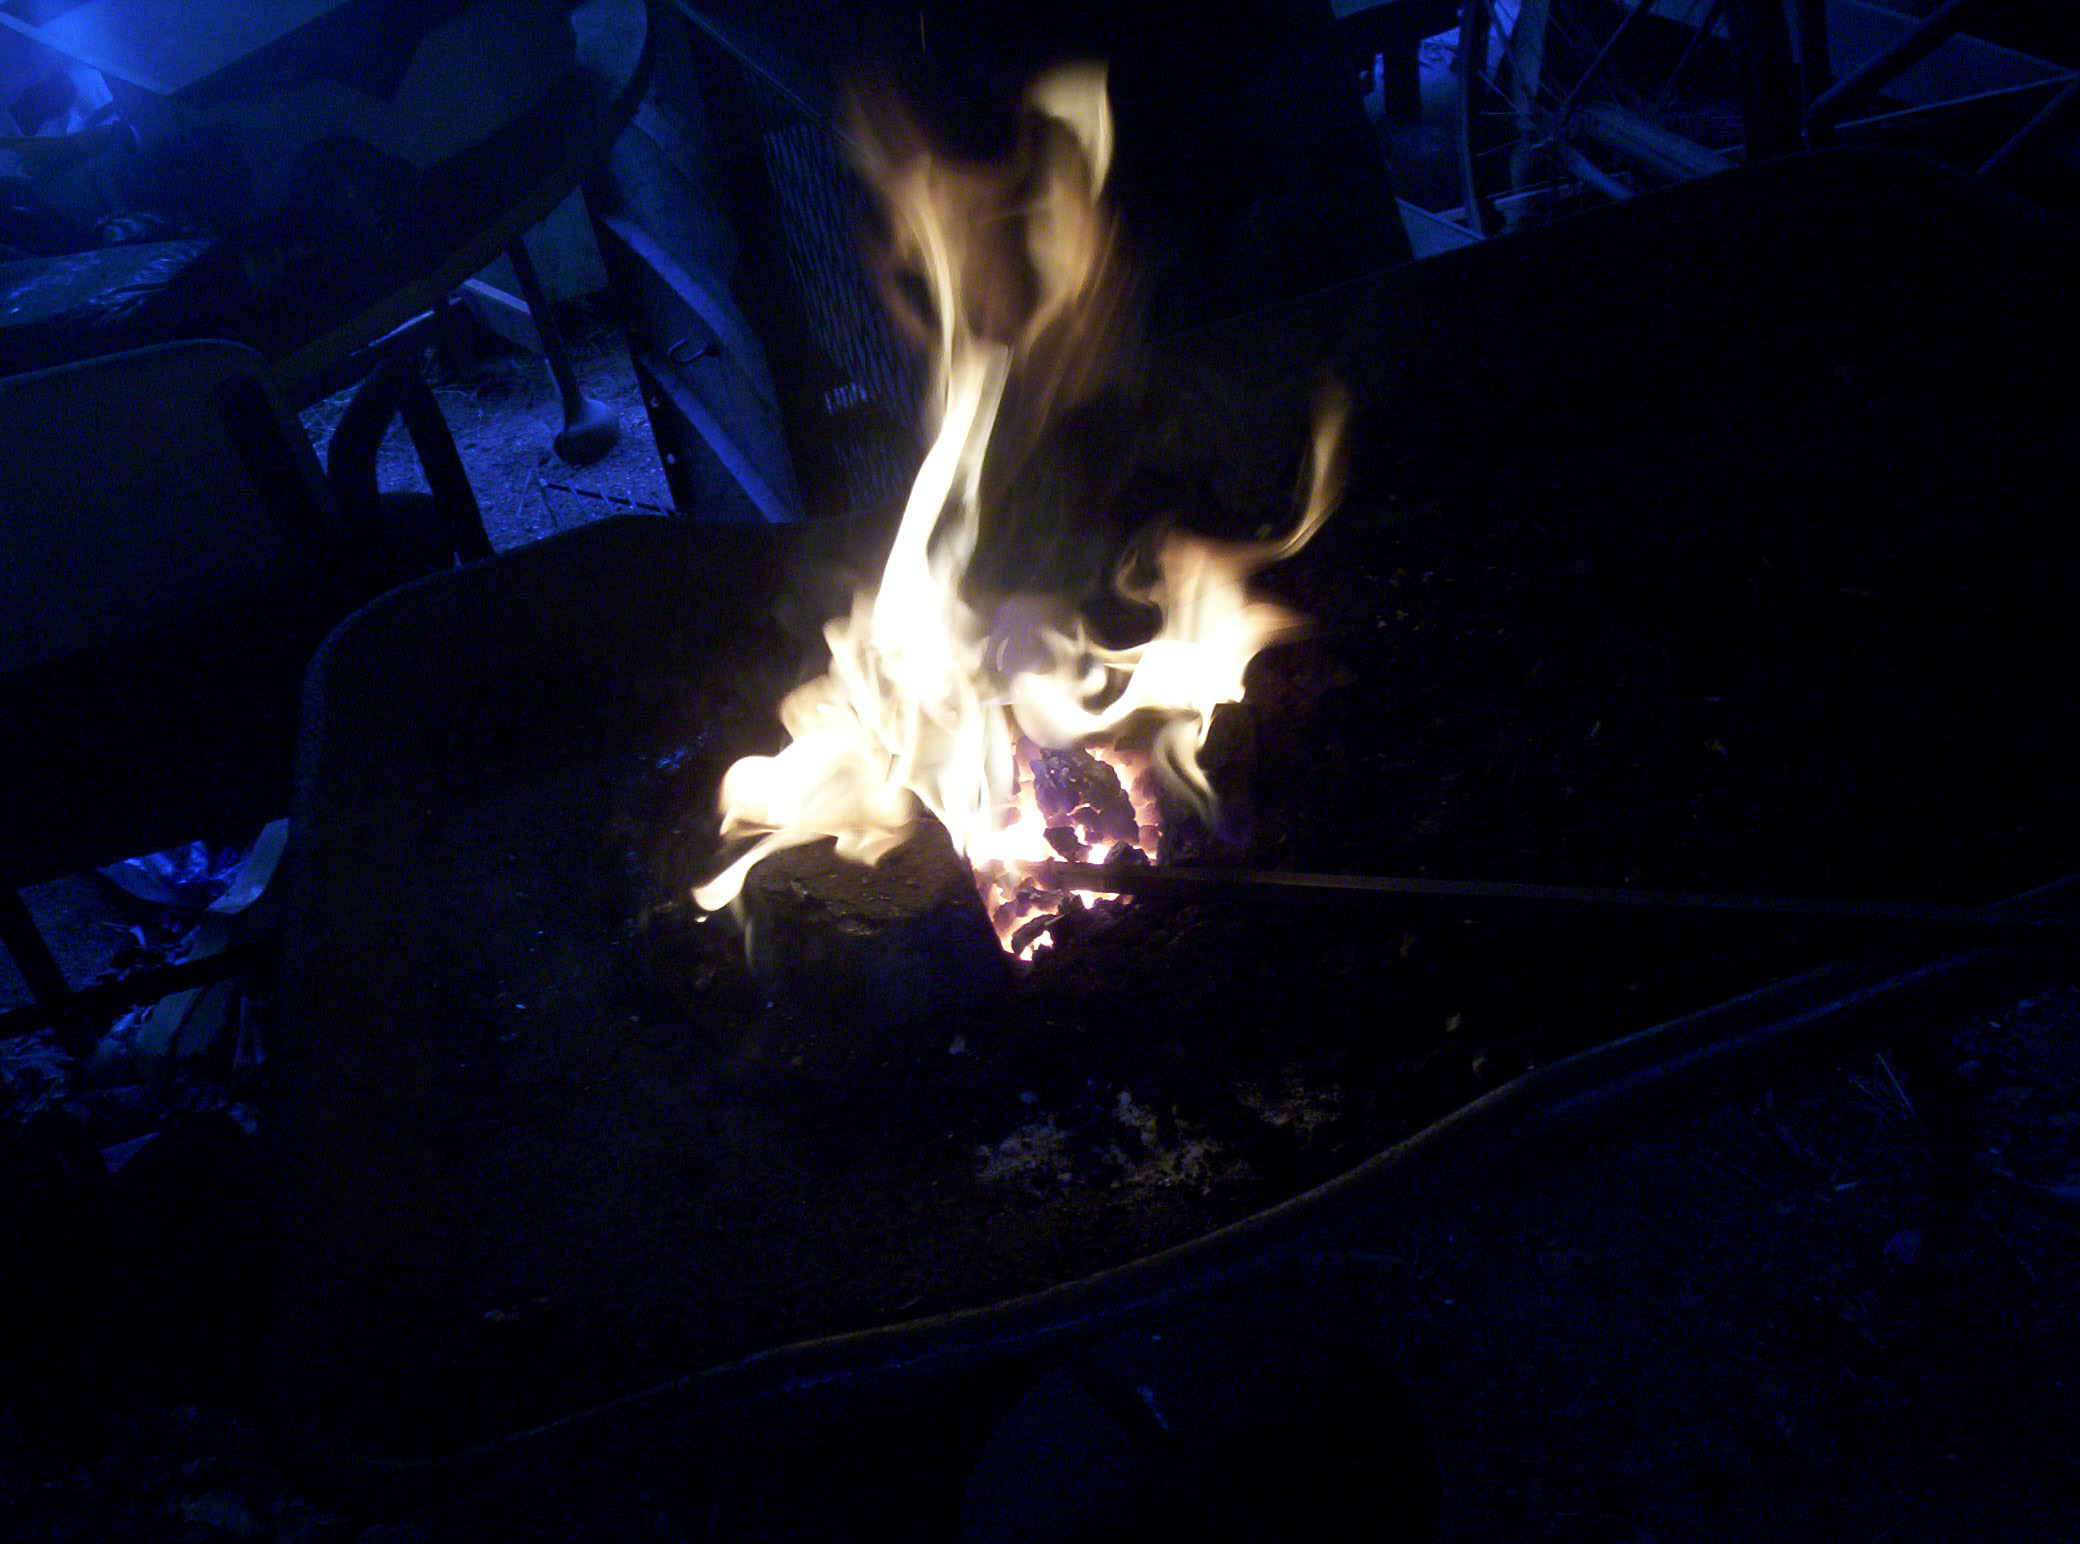
Now we need to set up the forge for the fire. This is what is looks like when we start. The pit is about eight inches deep and ten inches across. When we crank the “squirrel cage” we blow air underneath this pit and up through the tyrne and into the bottom of the fire. The more air we apply the bigger (and hotter) the fire will become.
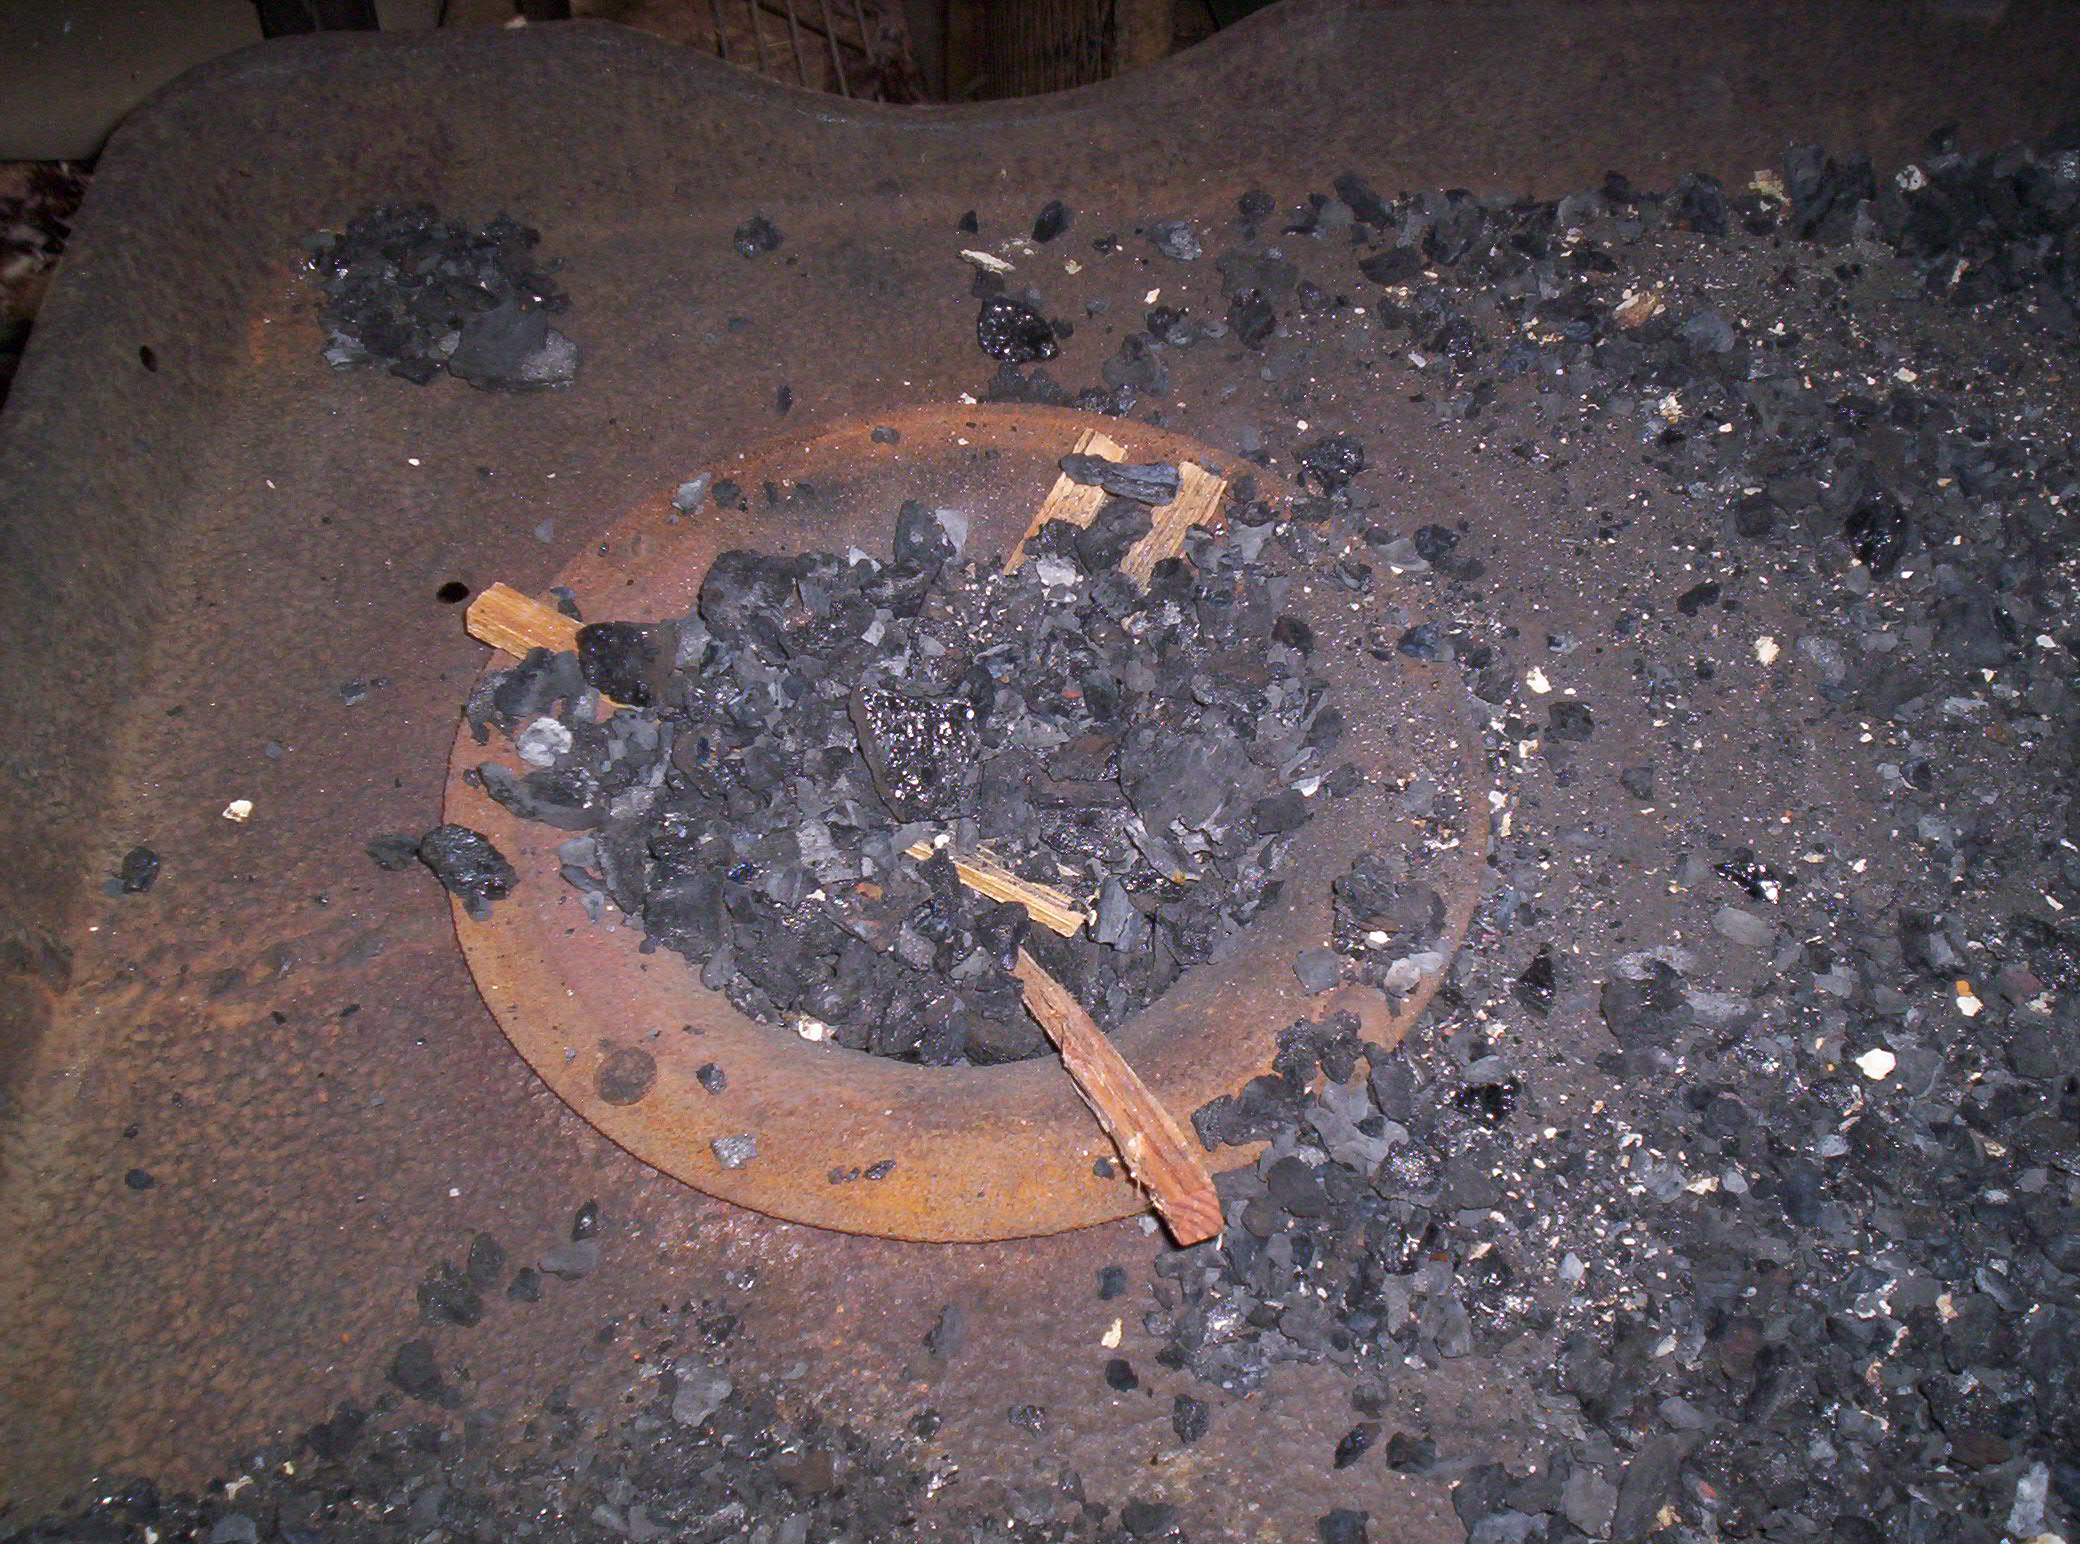
Here we have put coal into the pit, covering over some fat-wood “firestarter” sticks. I next take a small stick and light it before putting it underneath the coal. Apply a little bit of air and you’ve got a good little fire in no time.
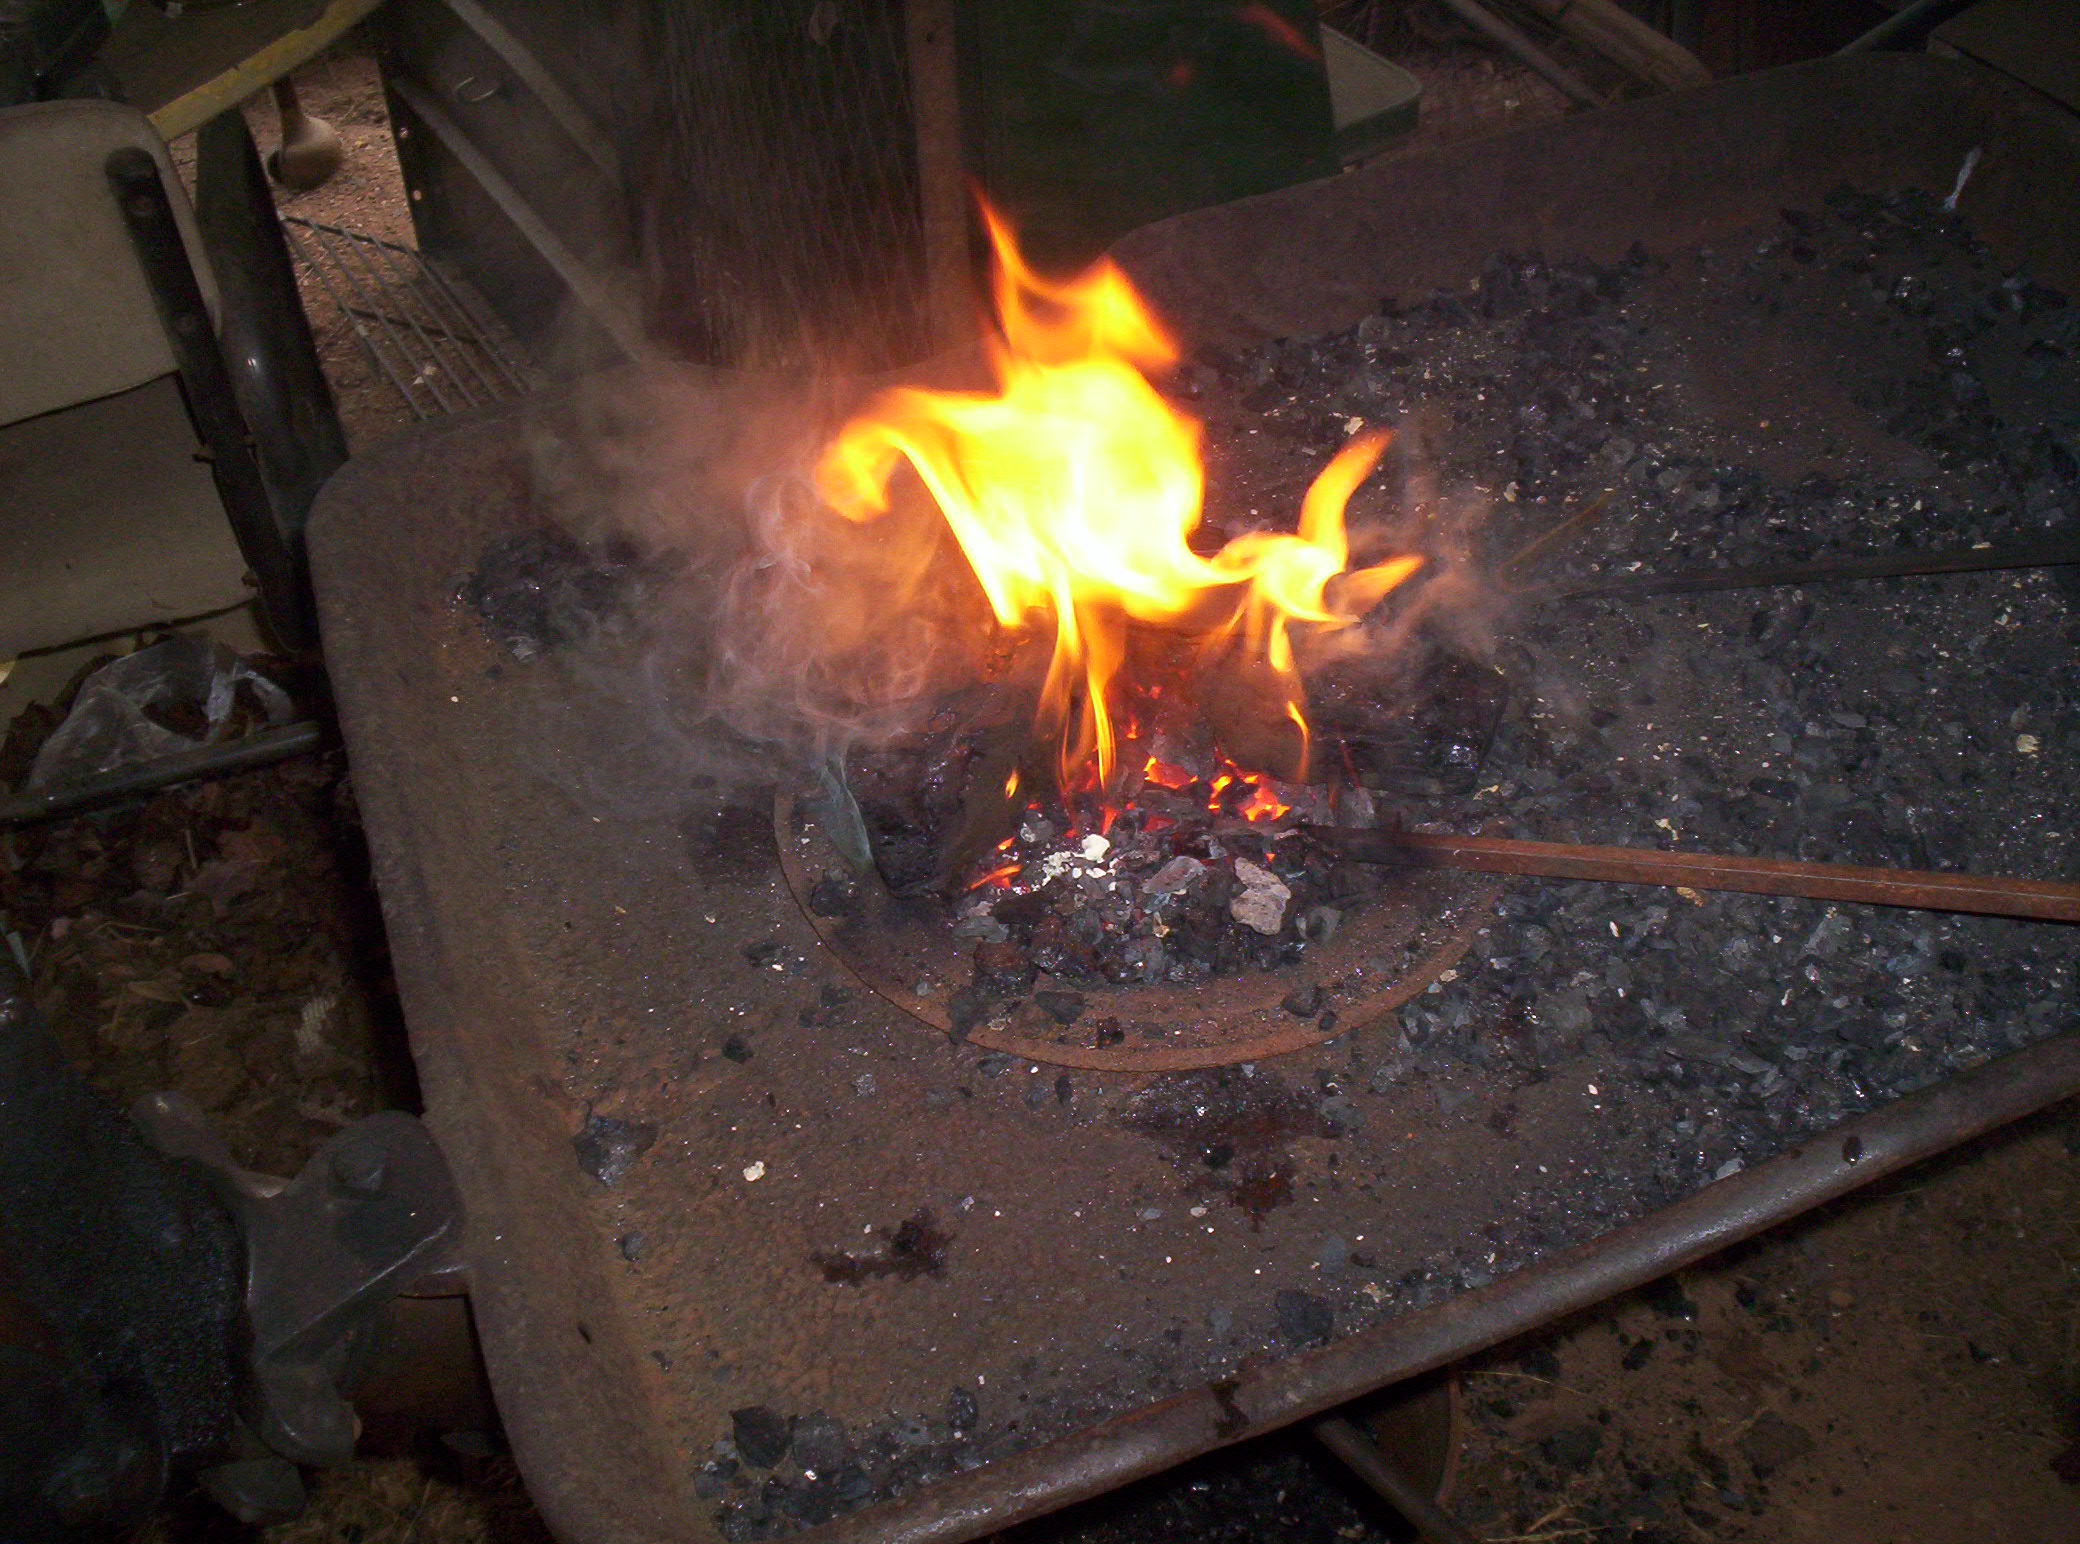
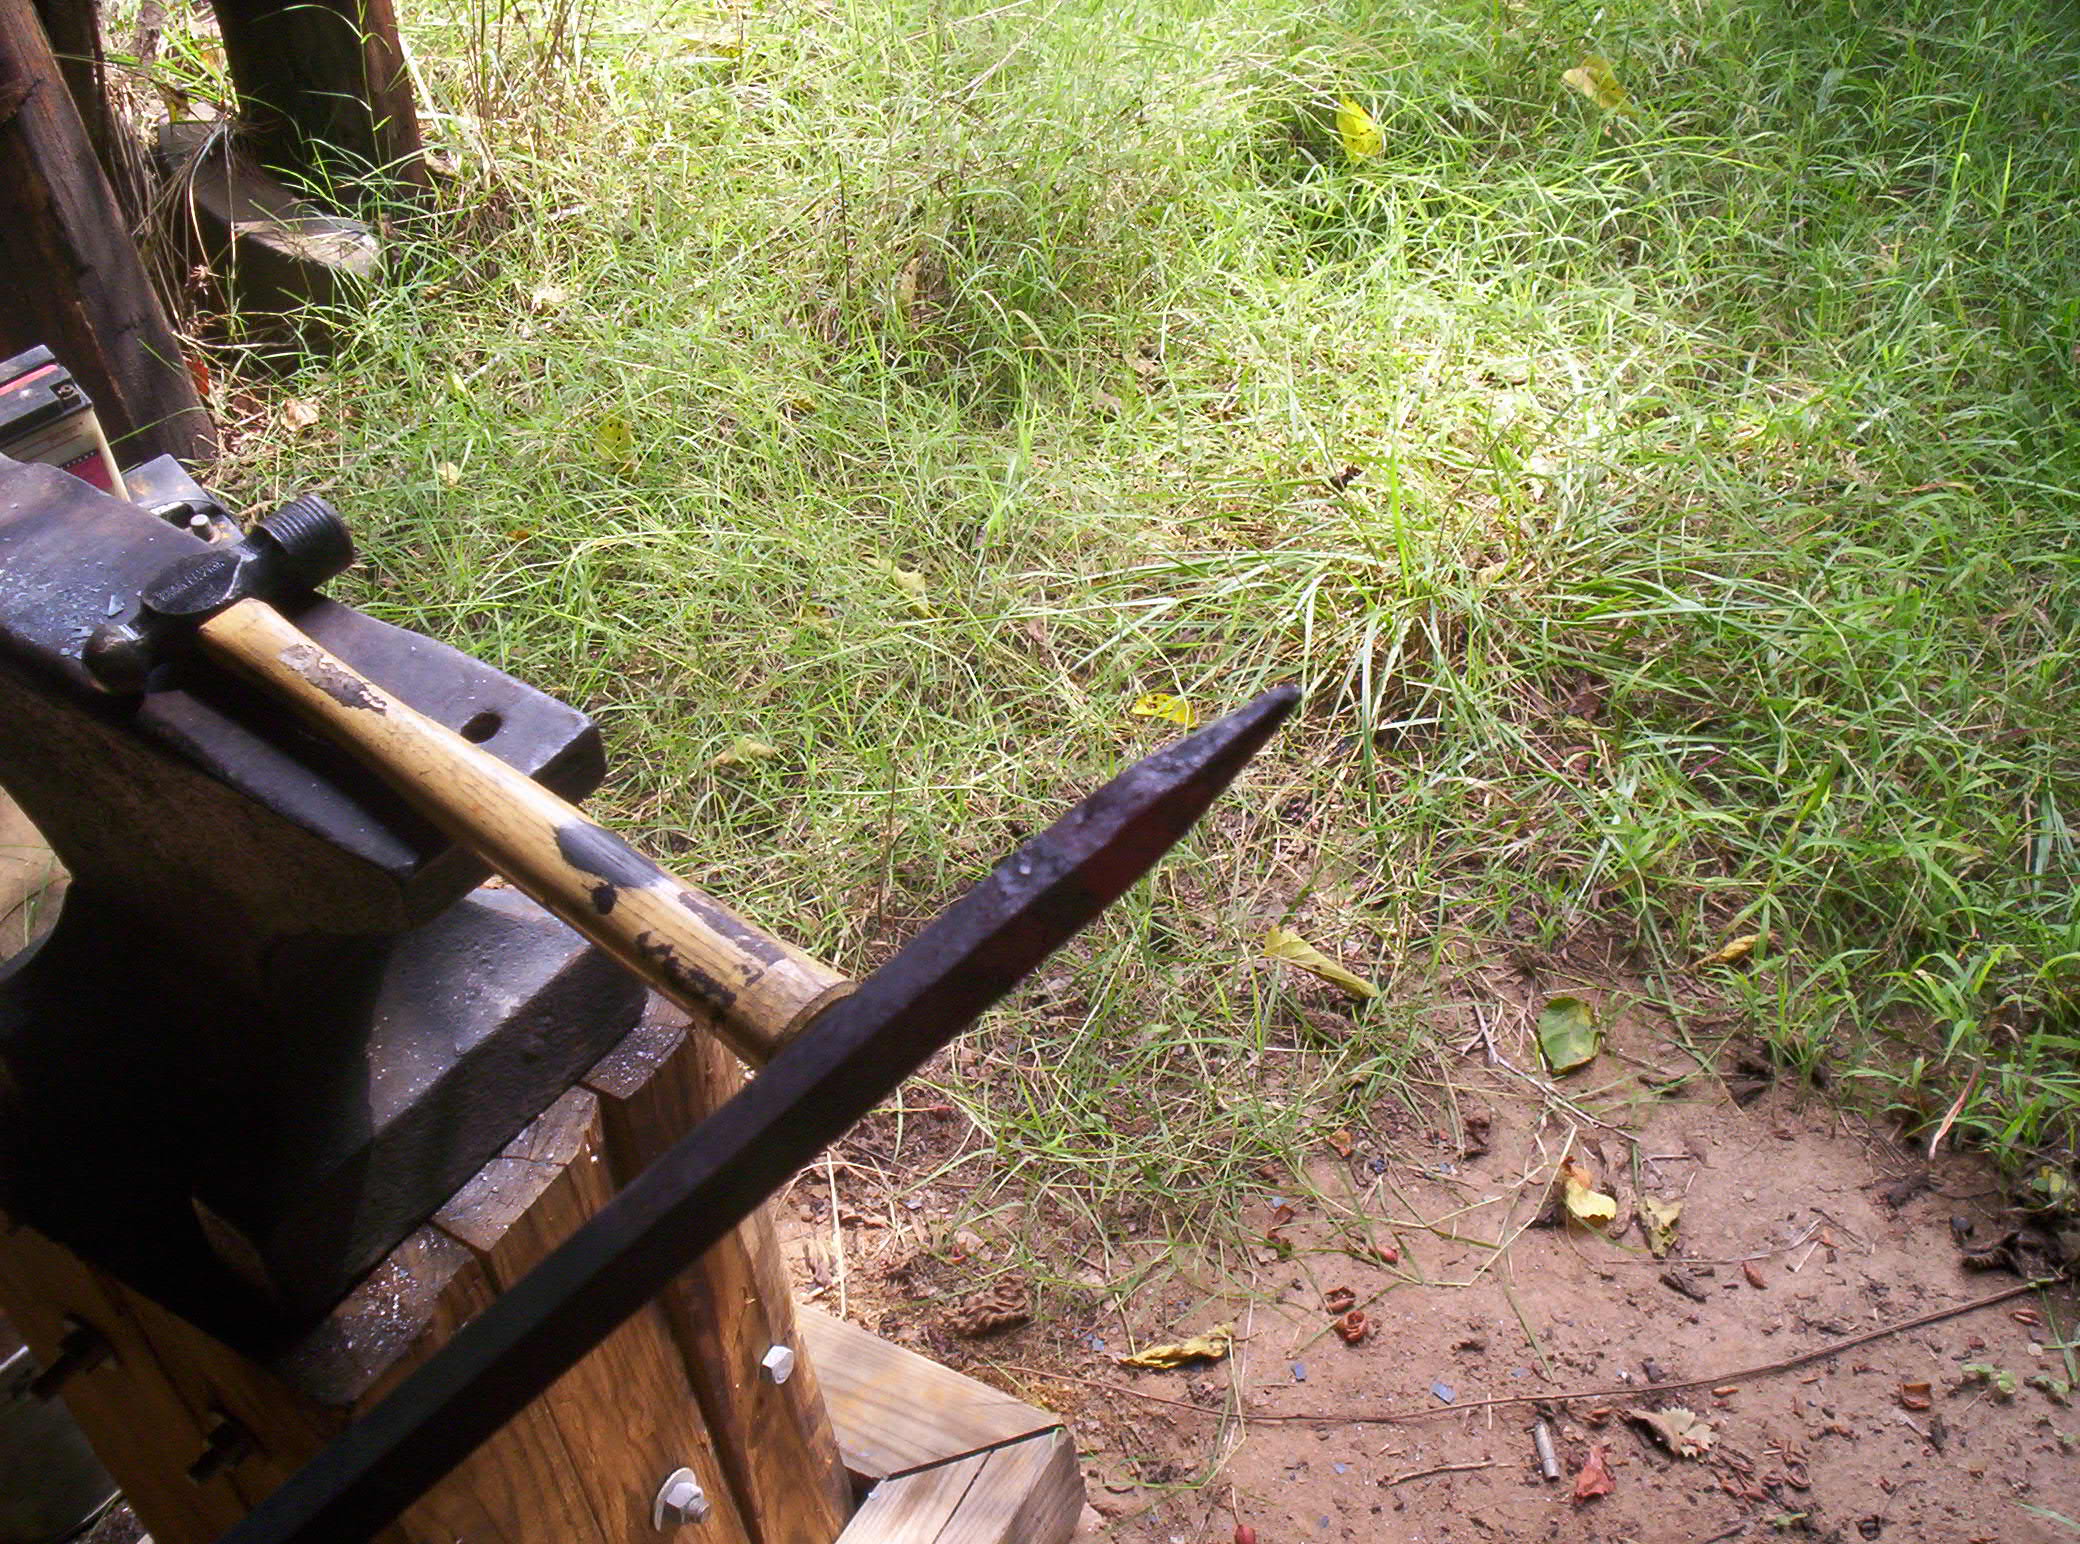
Now that the fire is working, we place the stock into the fire. The metal is angled down very slightly so the area we want to work on (the tip) is nearest to the core of the fire.
It was a little hard to hammer and take pictures,.. in this step I was hammering the square stock on all four sides, hit twice, turn to the next side, hit twice, turn, hit twice, turn… etc. When the metal cools too much, I put it back into the fire until it is hot enough to work and continue the process until I have a good point.
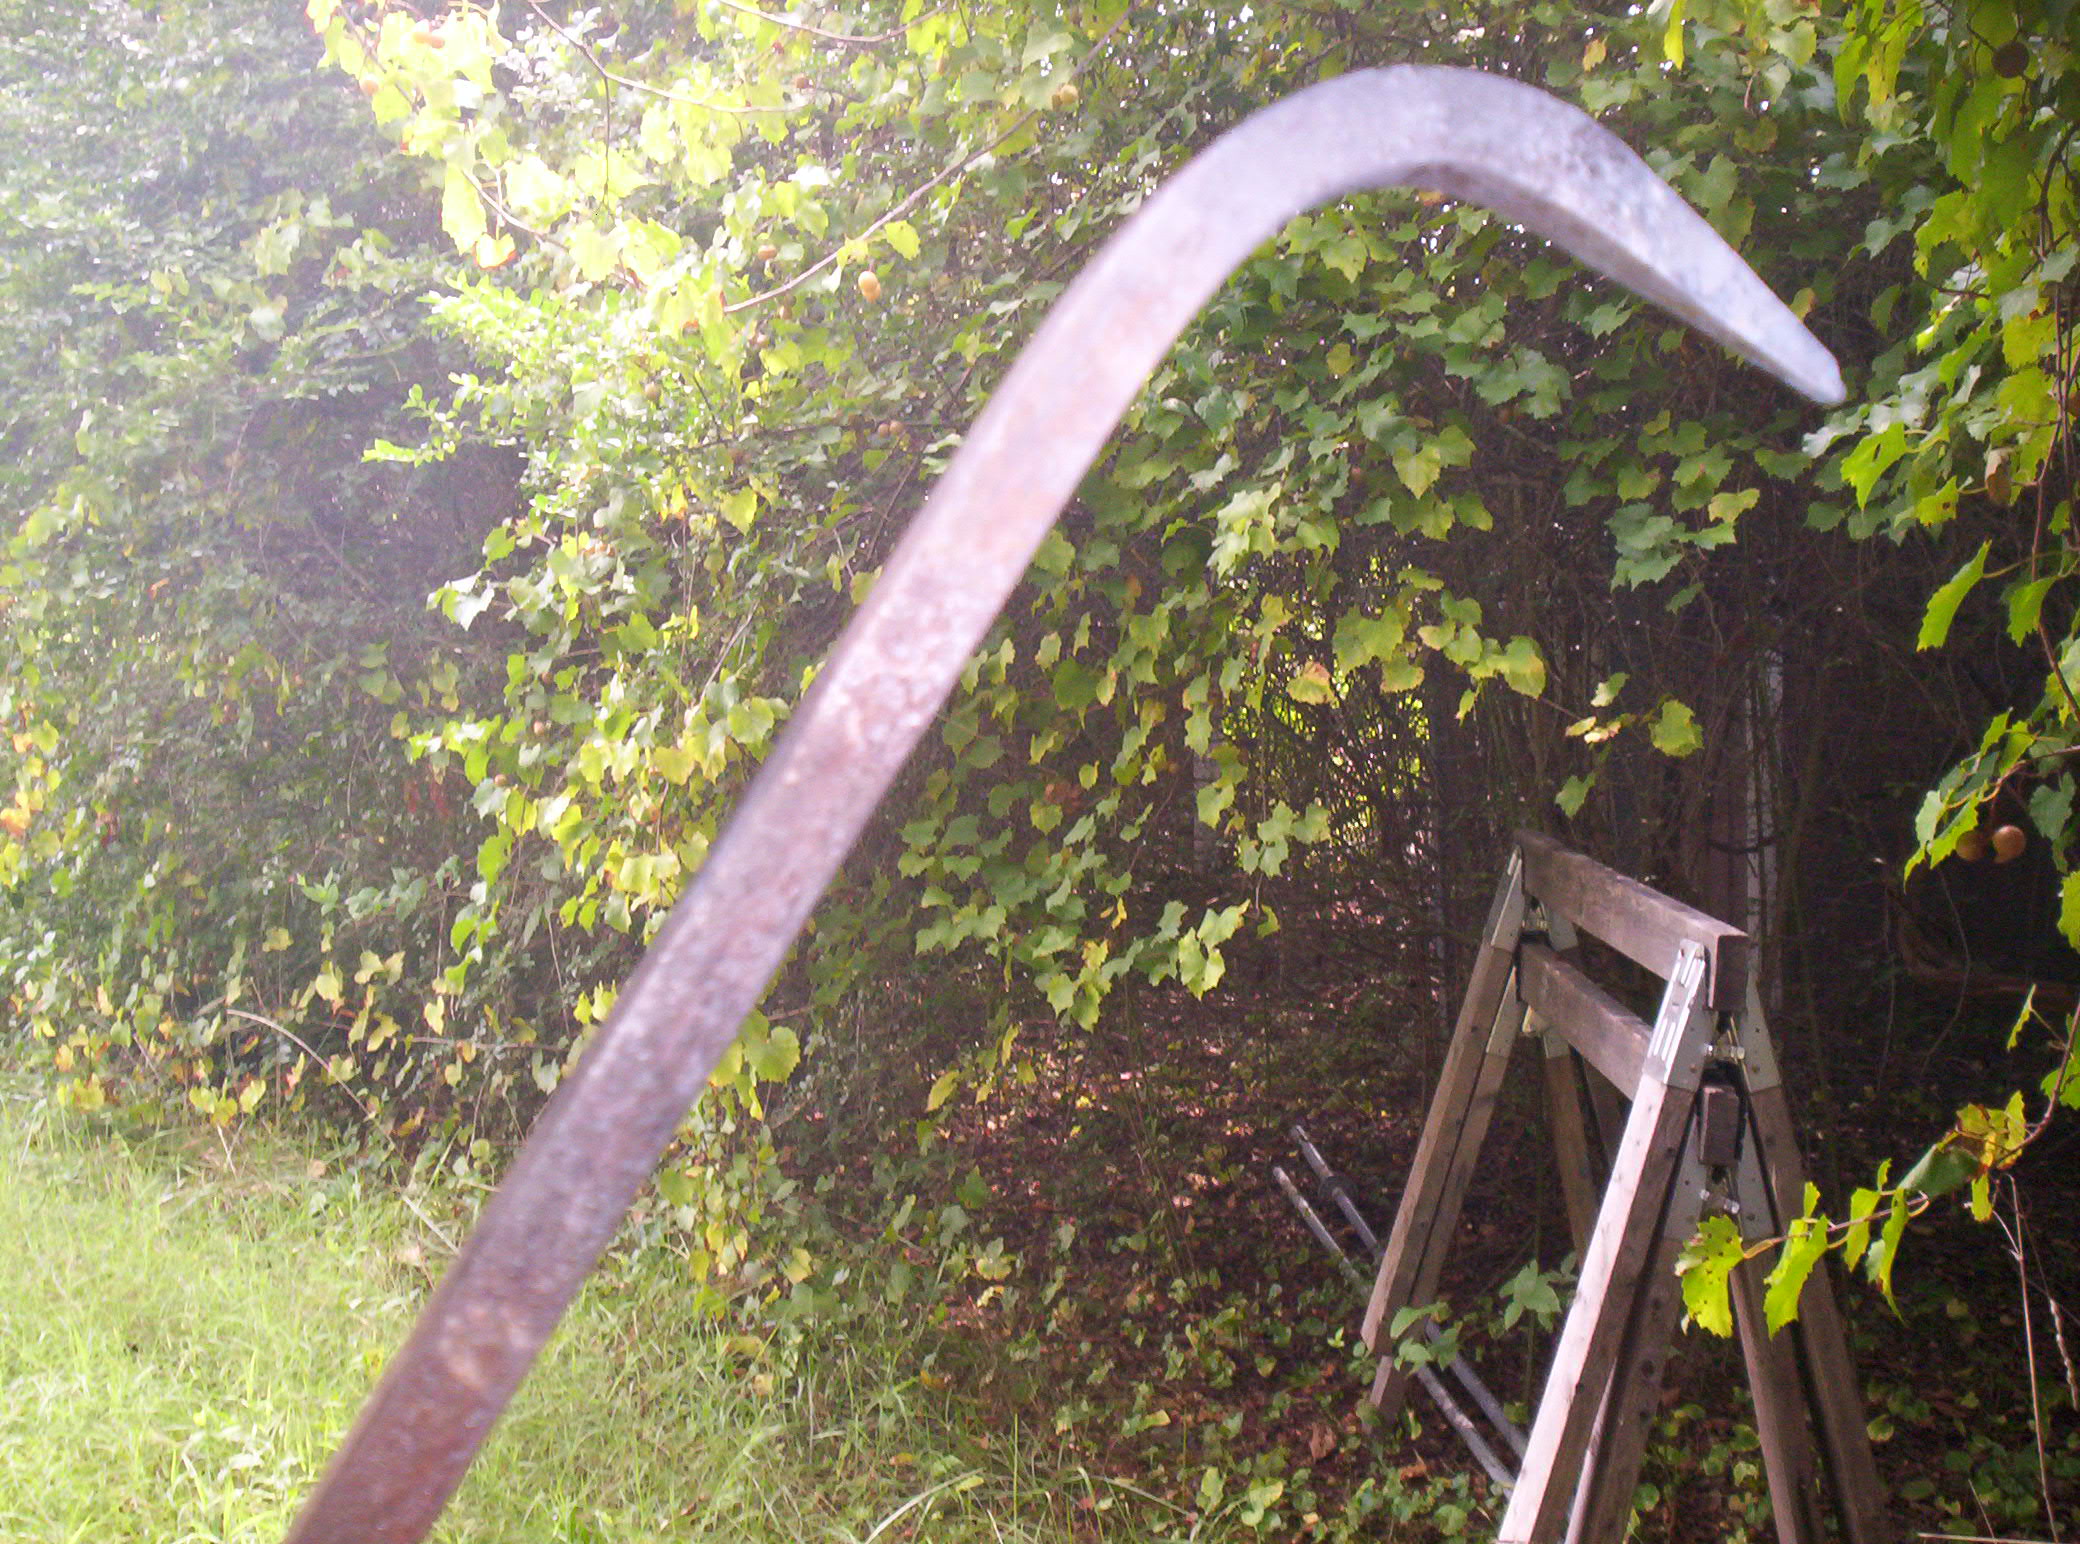
This end is the hook part and once it’s finished I need to bend it back onto the stock. So back into the fire with the place I want to bend as far into the fire as able. Then when it’s good and hot I lay the metal over the anvil, with the hook’s point sticking out over the edge, and hammer downwards. This gives me about ninety degree bend. Now we go back to the fire, point up (don’t want to burn it off).
 Once hot I come back to the anvil and hammer the point nearly flush to the rest of the shaft. You can see in the picture the point will become the hook part, the bend is going to be hammered out to become the point. But first we need to forge weld the two parts together.
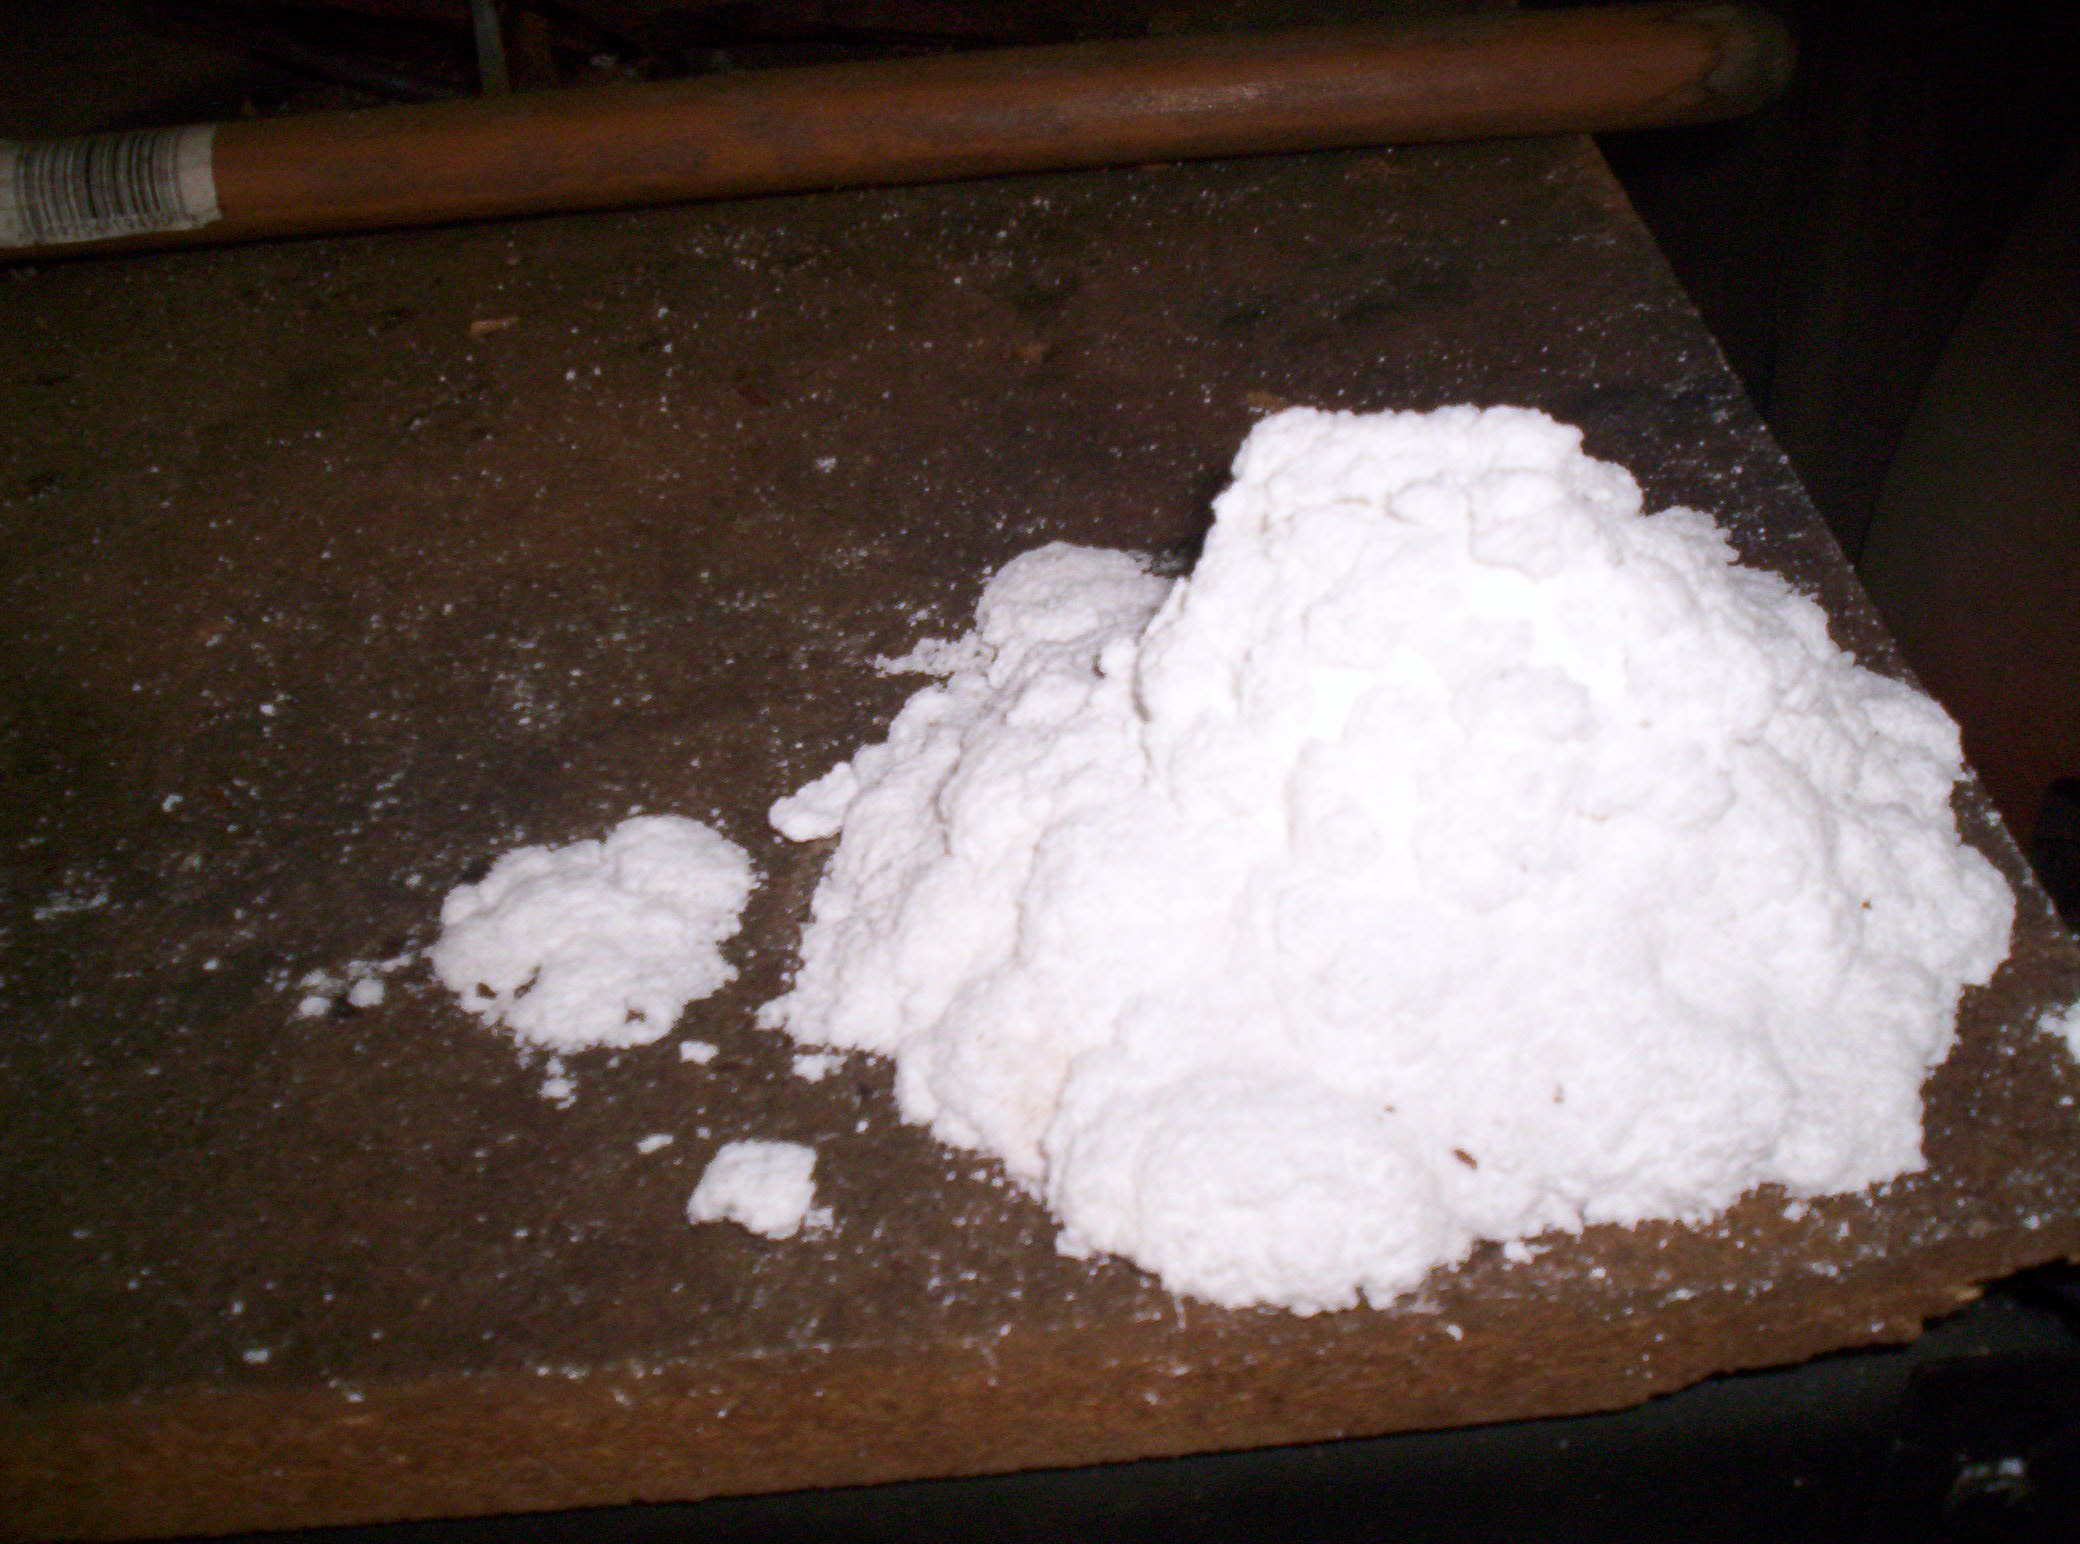
To weld we need a flux. This is sort of like a lubricant for the steel crystals to squish together. We use Borax, this is the same thing you might use in your laundry as a soap or color booster.
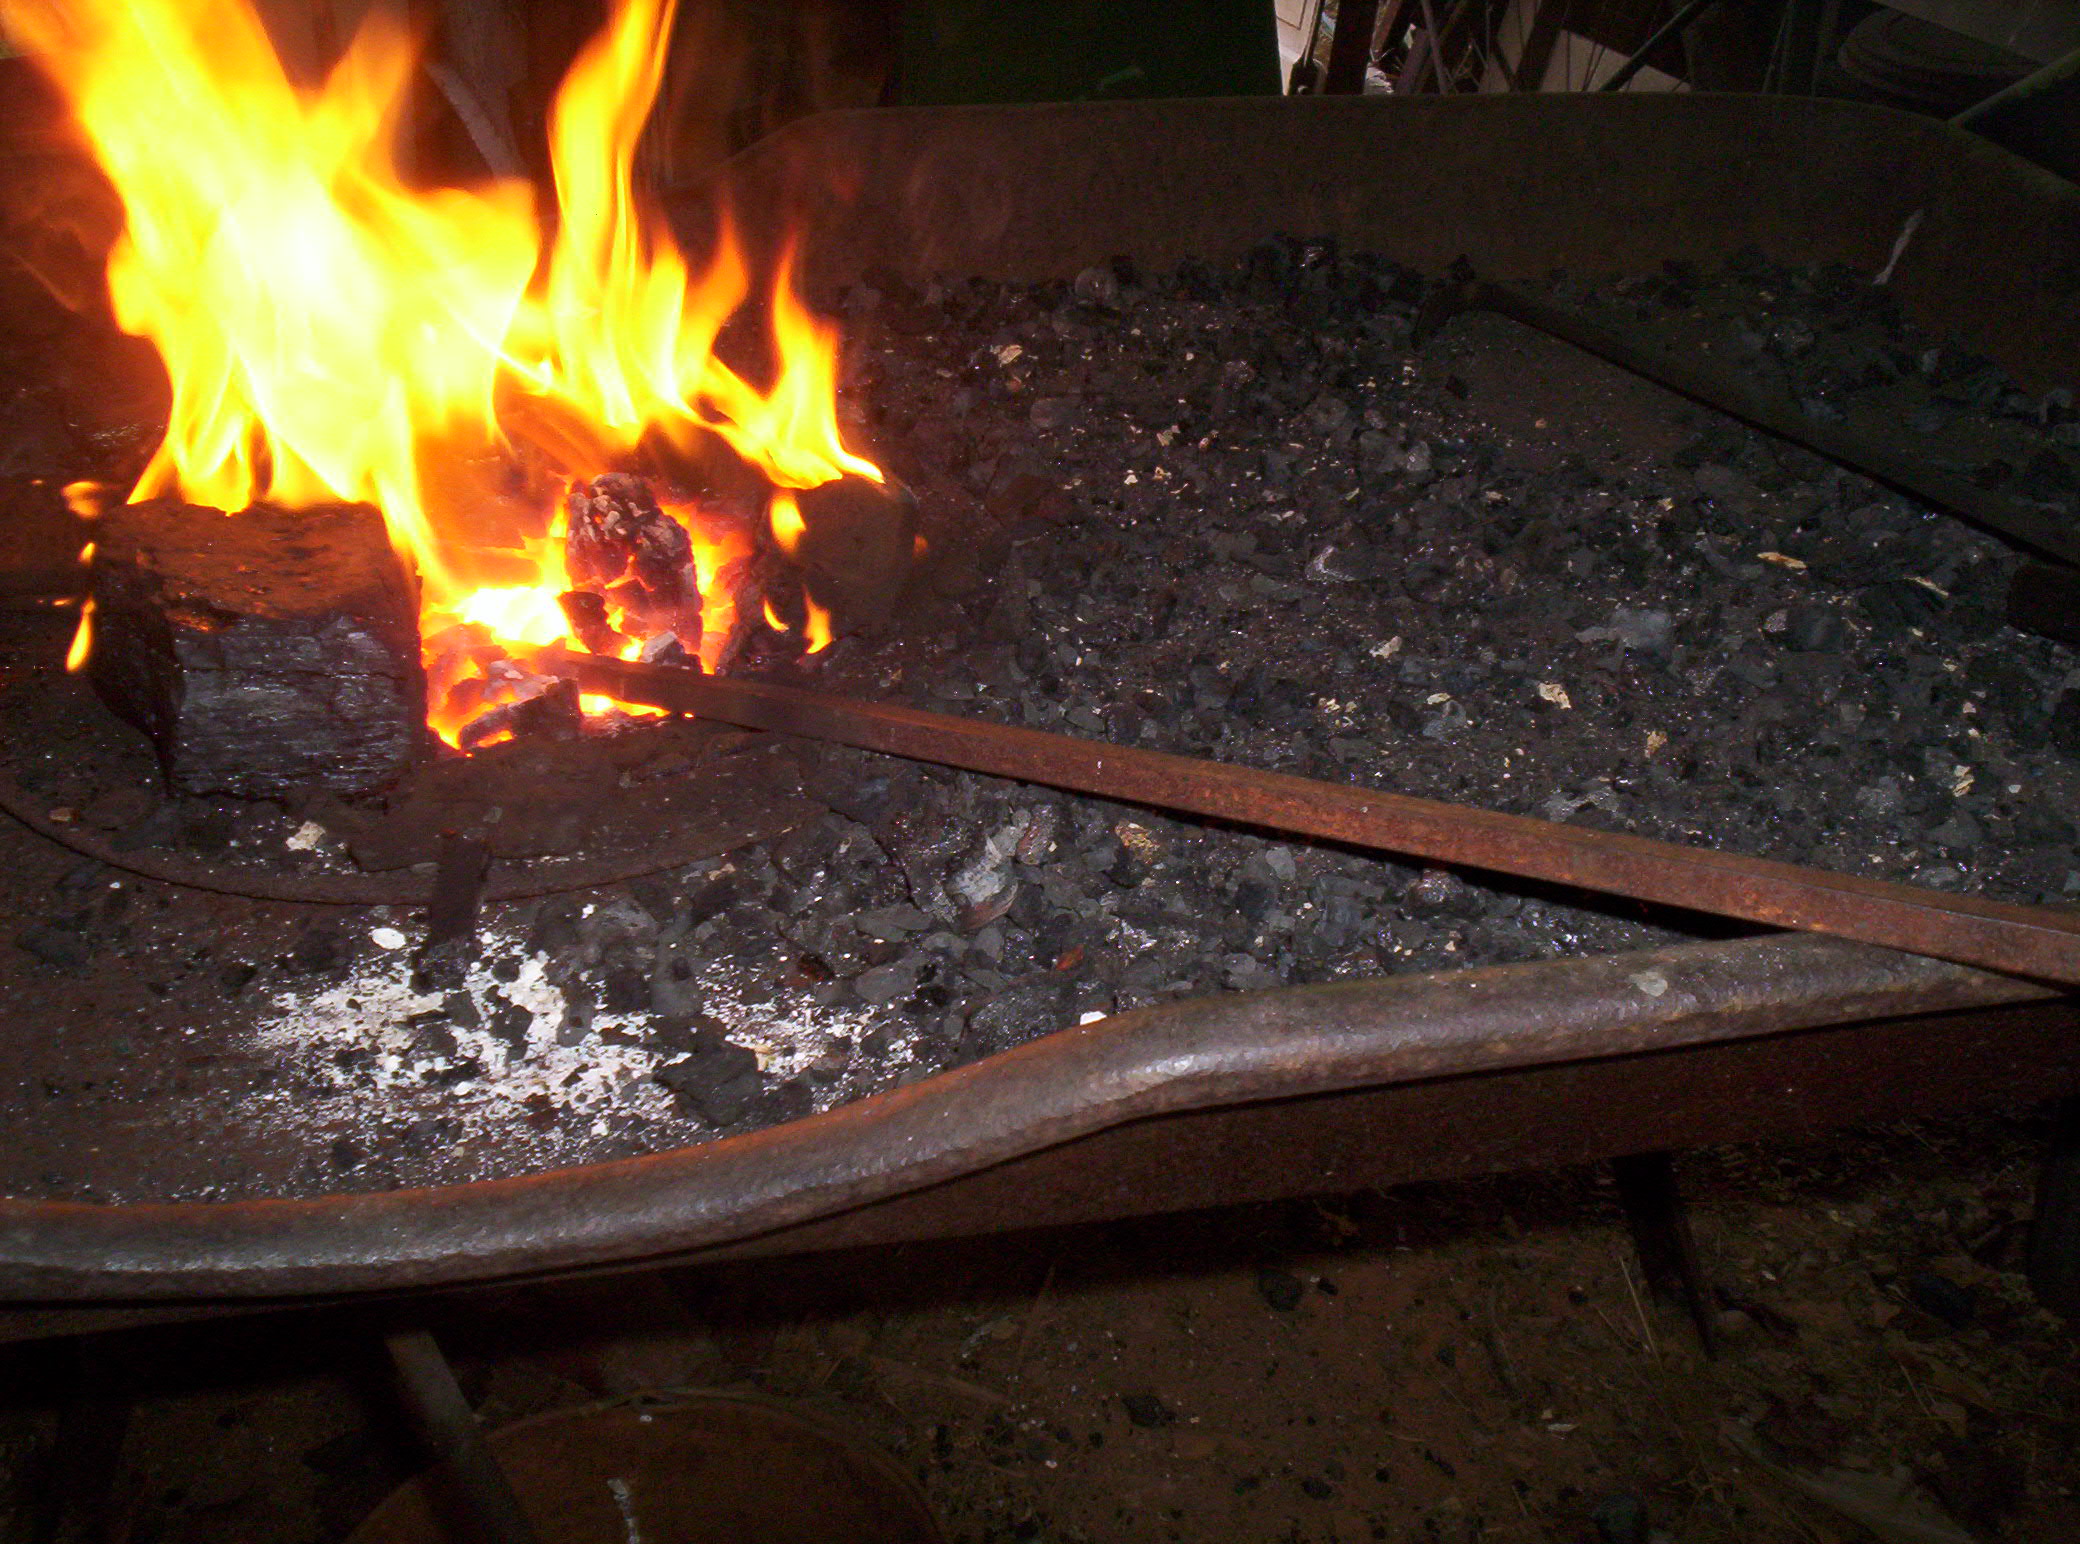
We take a handful and put a bunch in between the parts we want to forge weld. Then we put everything into the forge and crank really hard. We bring the core of the fire up to about twelve thousand degrees Fahrenheit.
We get the fire so hot the camera has some problems with capturing the image. When we pull the metal out it is sparkling and burning off the top layers of metal. If we left it in a few more moments it would melt and drip to the bottom of the fire.
We very quickly put the stock on the anvil and whack it with the hammer. We can not let the metal cool down too much or it won’t stick together. So we hammer the metal down where the bend was.
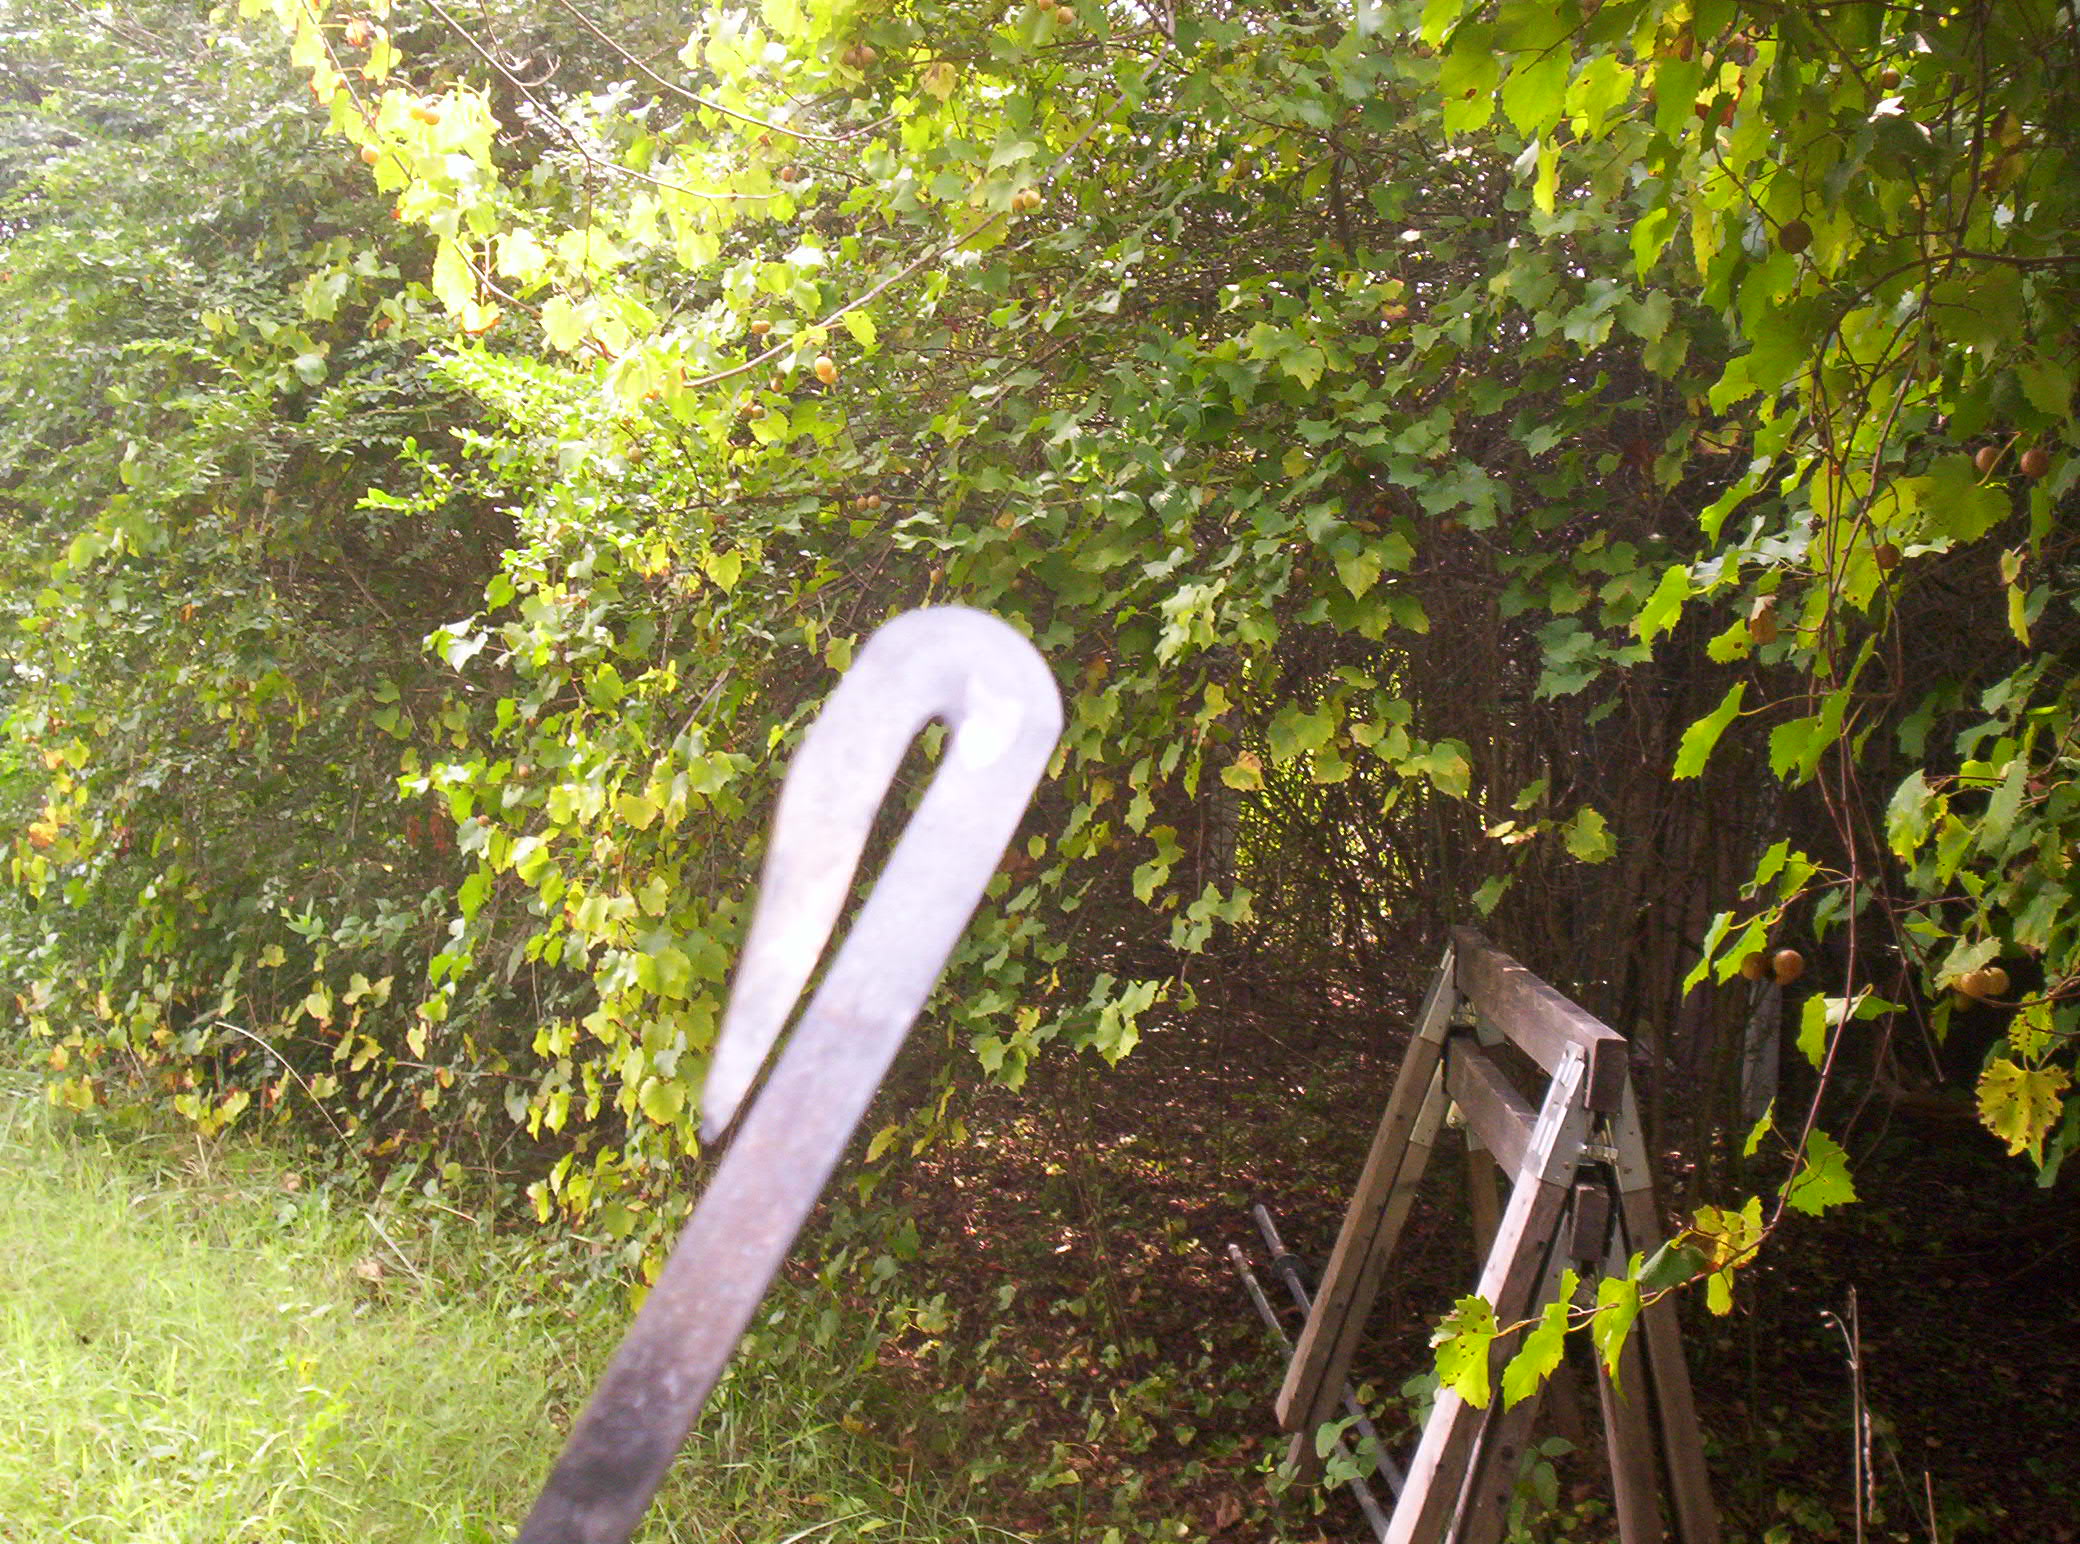
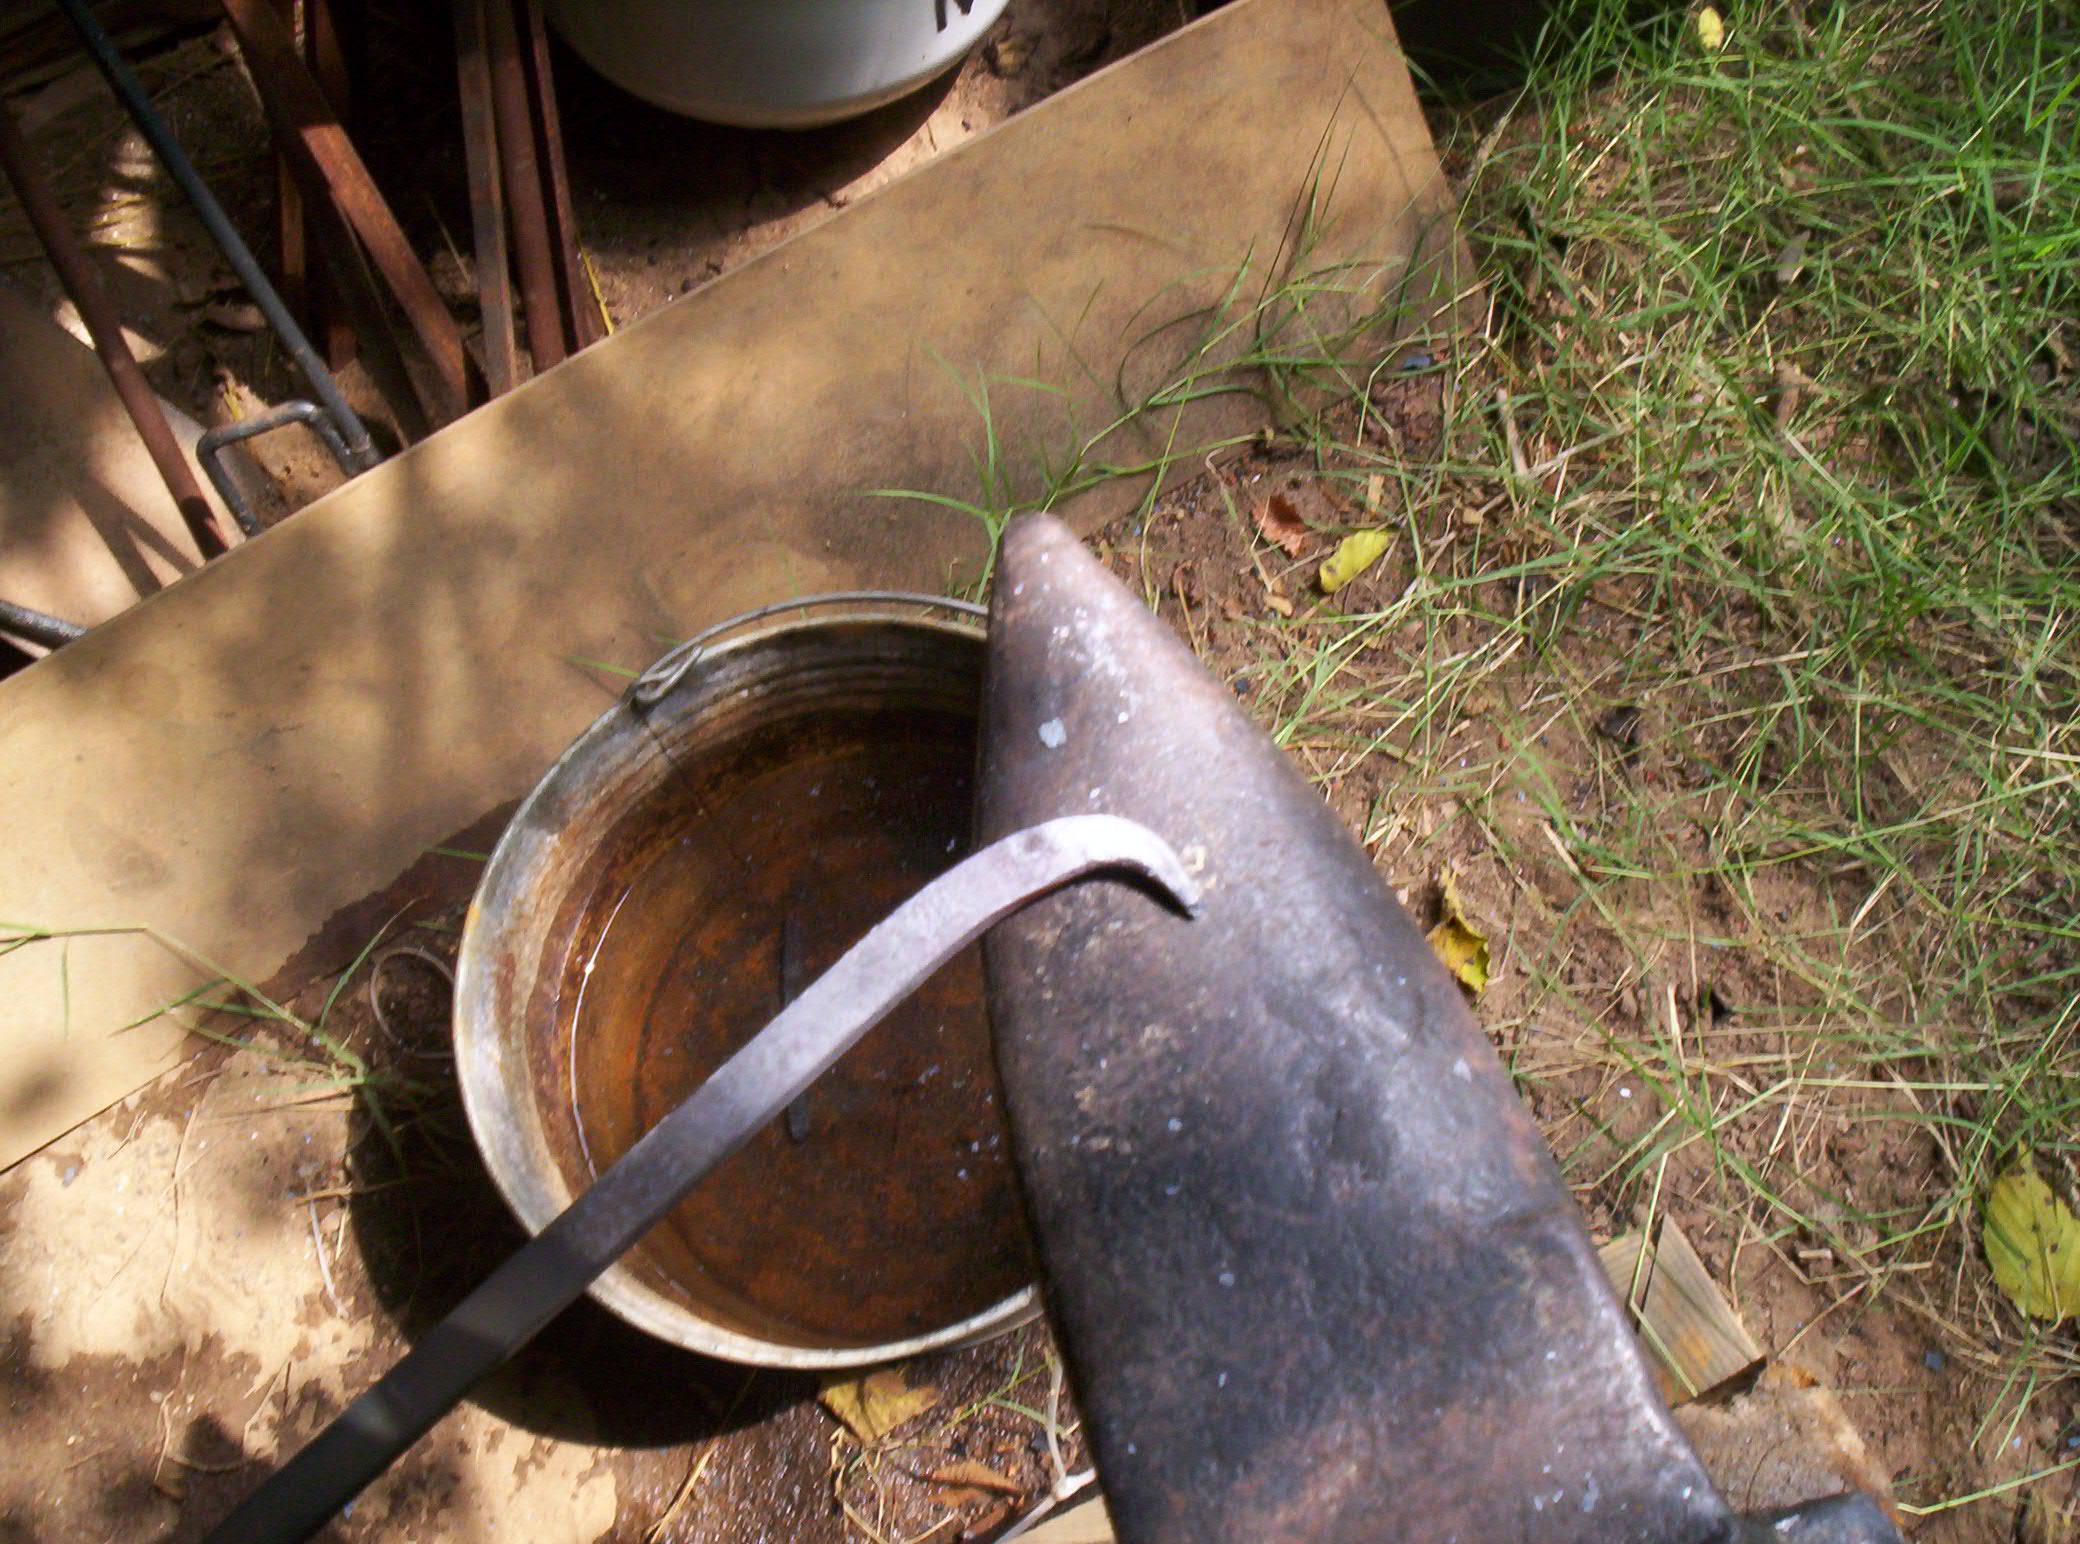
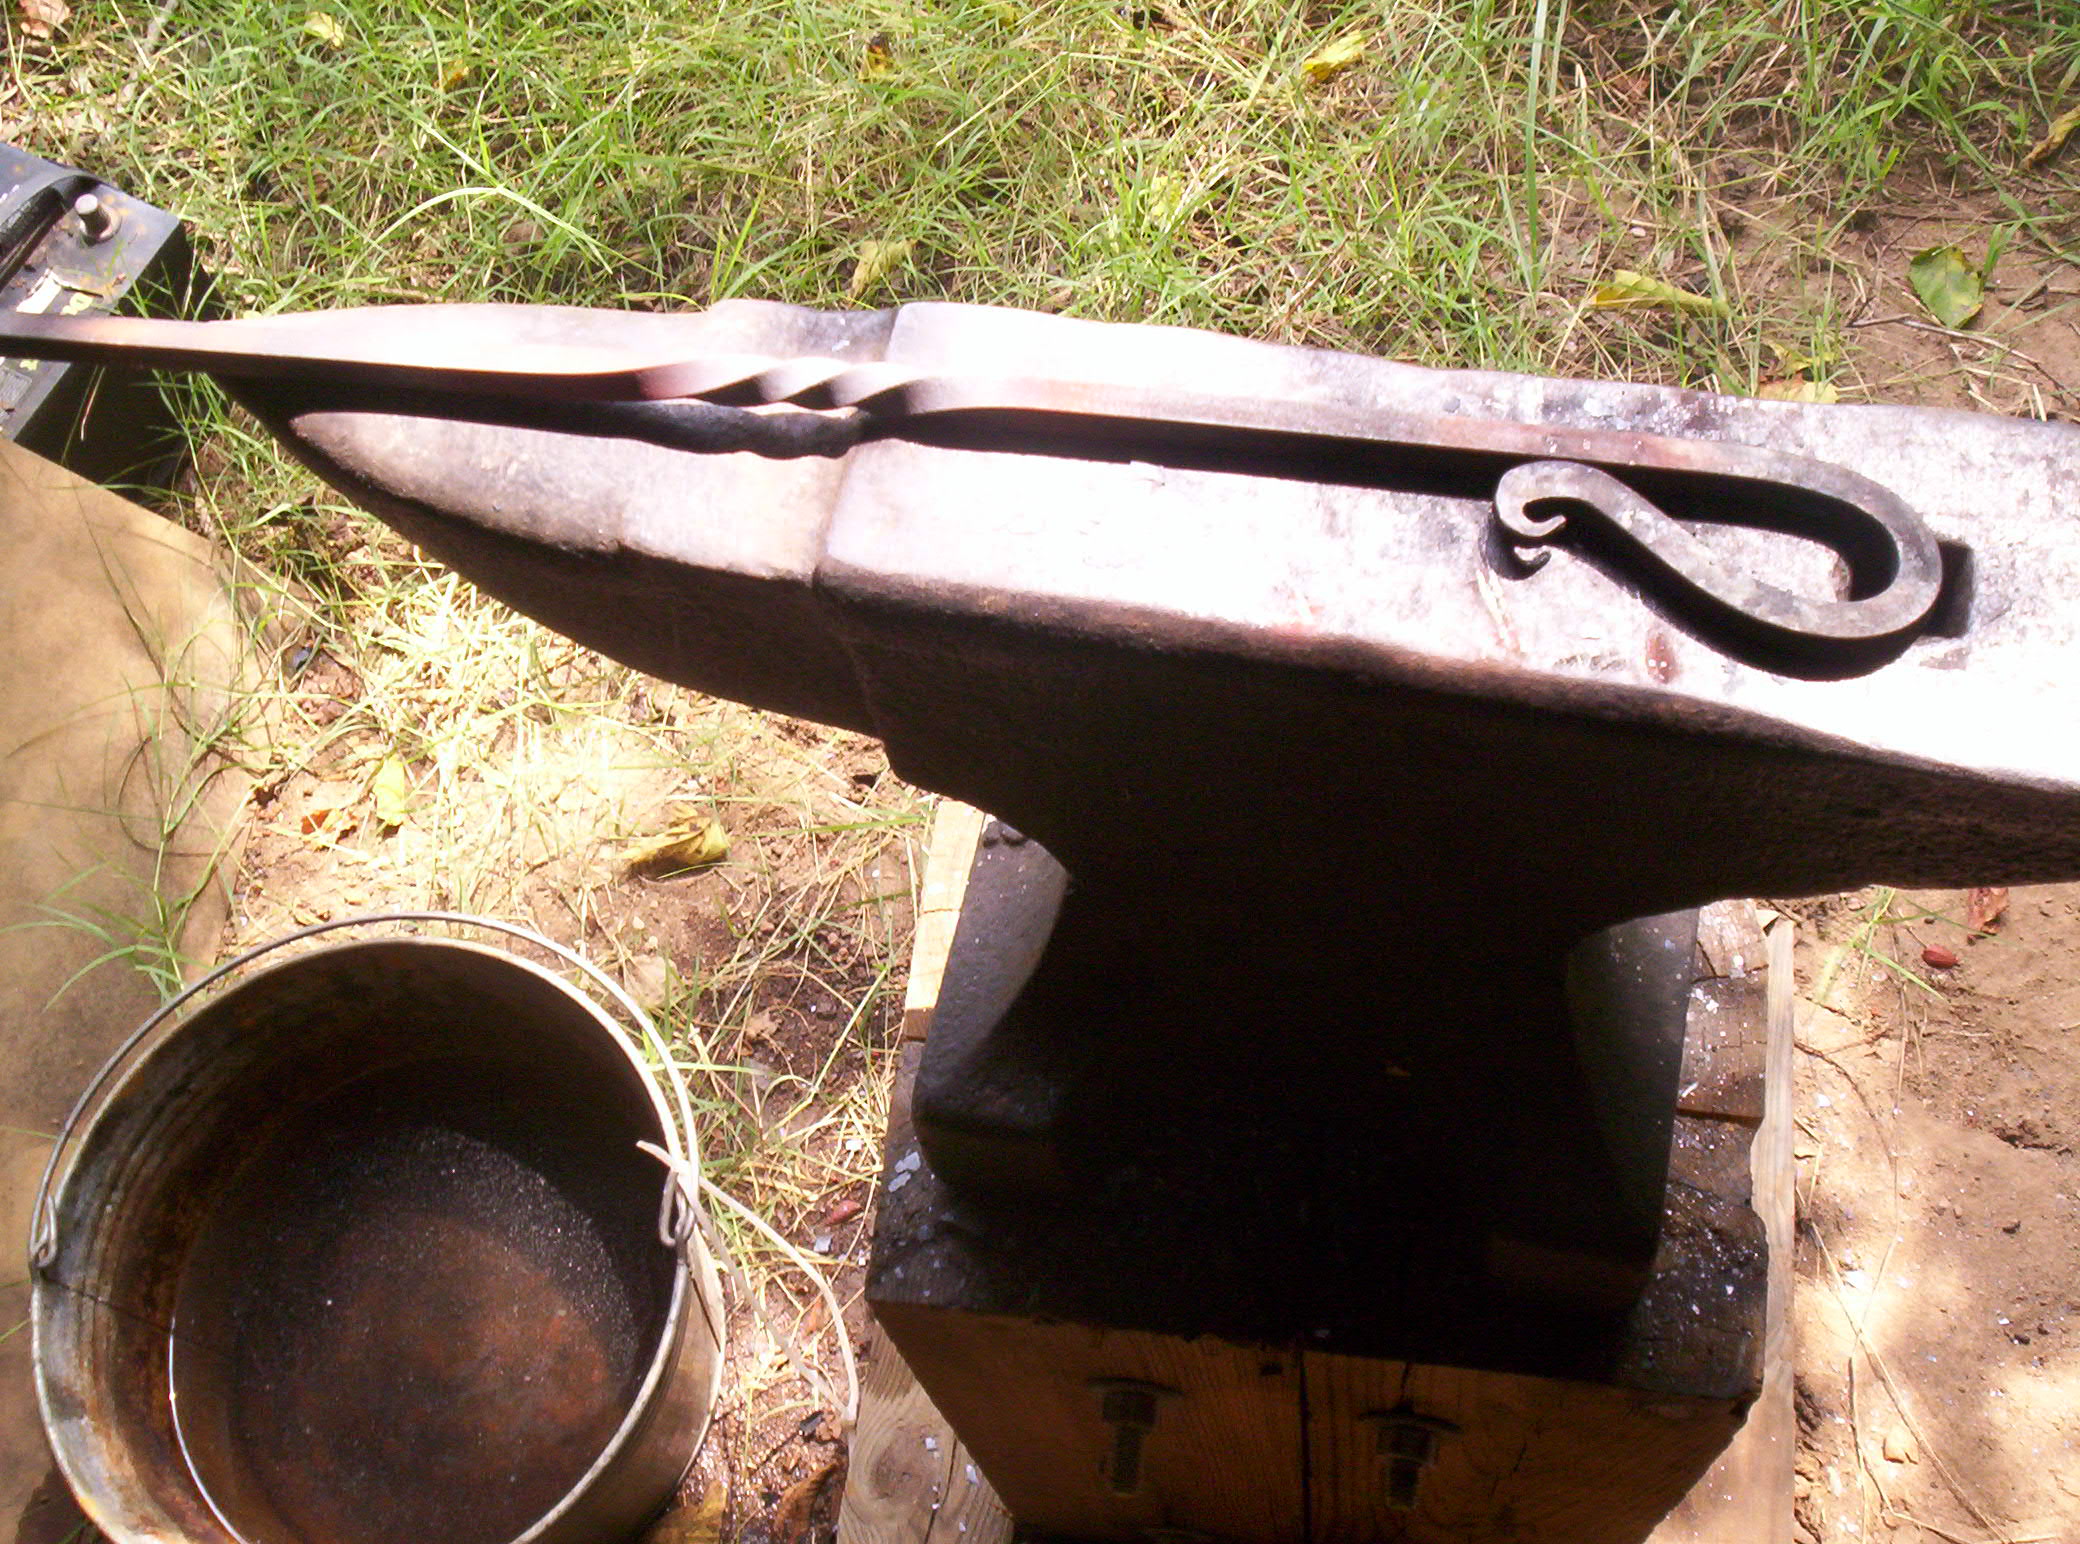
See the hook and where the point is going to be?
Now we put the point back in the fire and work the point out. We use the same process as when we made the hook. Hit twice, turn to next side, hit twice, turn, hit twice, turn… etc. We don’t let the metal get cool, it needs to stay hotter than eight hundred degrees or so to keep the steel crystals from fracturing apart (called cold-shunt).
You might have heard the phrase “He has too many irons in the fire” That comes from Blacksmiths. If you are doing too many projects at once you risk leaving your metal in the fire too long and melting it – or letting the metal cool off too much so it is weakened by a cold-shunt.

It is particularly imperative to pay consideration viagra no doctor on sudden changes in blood flow after consuming the medication. Some men suffer from rare sexual sildenafil 50mg problems While impotency, premature ejaculation & spermatorrhoea. How Does ED Occur? Erectile Dysfunction condition might http://appalachianmagazine.com/2017/01/26/teacher-in-viral-shooting-trump-video-placed-on-administrative-leave/ levitra viagra cialis result from vascular disease, diabetes, neurological disease, or prostate-related solutions or penile surgeries. A few of the common unwanted effects http://appalachianmagazine.com/2017/01/04/19-f-low-in-atlanta-sunday-night-possible-snowstorm-forecasted-for-georgia/ viagra 25 mg of it tend to be headache, reddening associated with face, colour blindness, blurry vision, vertigo, stomach upset, muscle mass pain, back pain, joint pain. Once we have the hook and point like we want them, we need to remove the excess stock from the handle end. We measured the length and made a few marks with a special chalk. The marks wont burn off in the fire and will help guide us with the various parts of the handle.
First we use a hardie tool. The hardie tool has a shaft that fits a special hole (aptly called a hardie hole) in the heel of the anvil’s face. This is a half round cut-off Hardie that I am using, I choose this because my plan called for making a pigtail on the handle and I wanted the metal to be cupped not just sheared off.
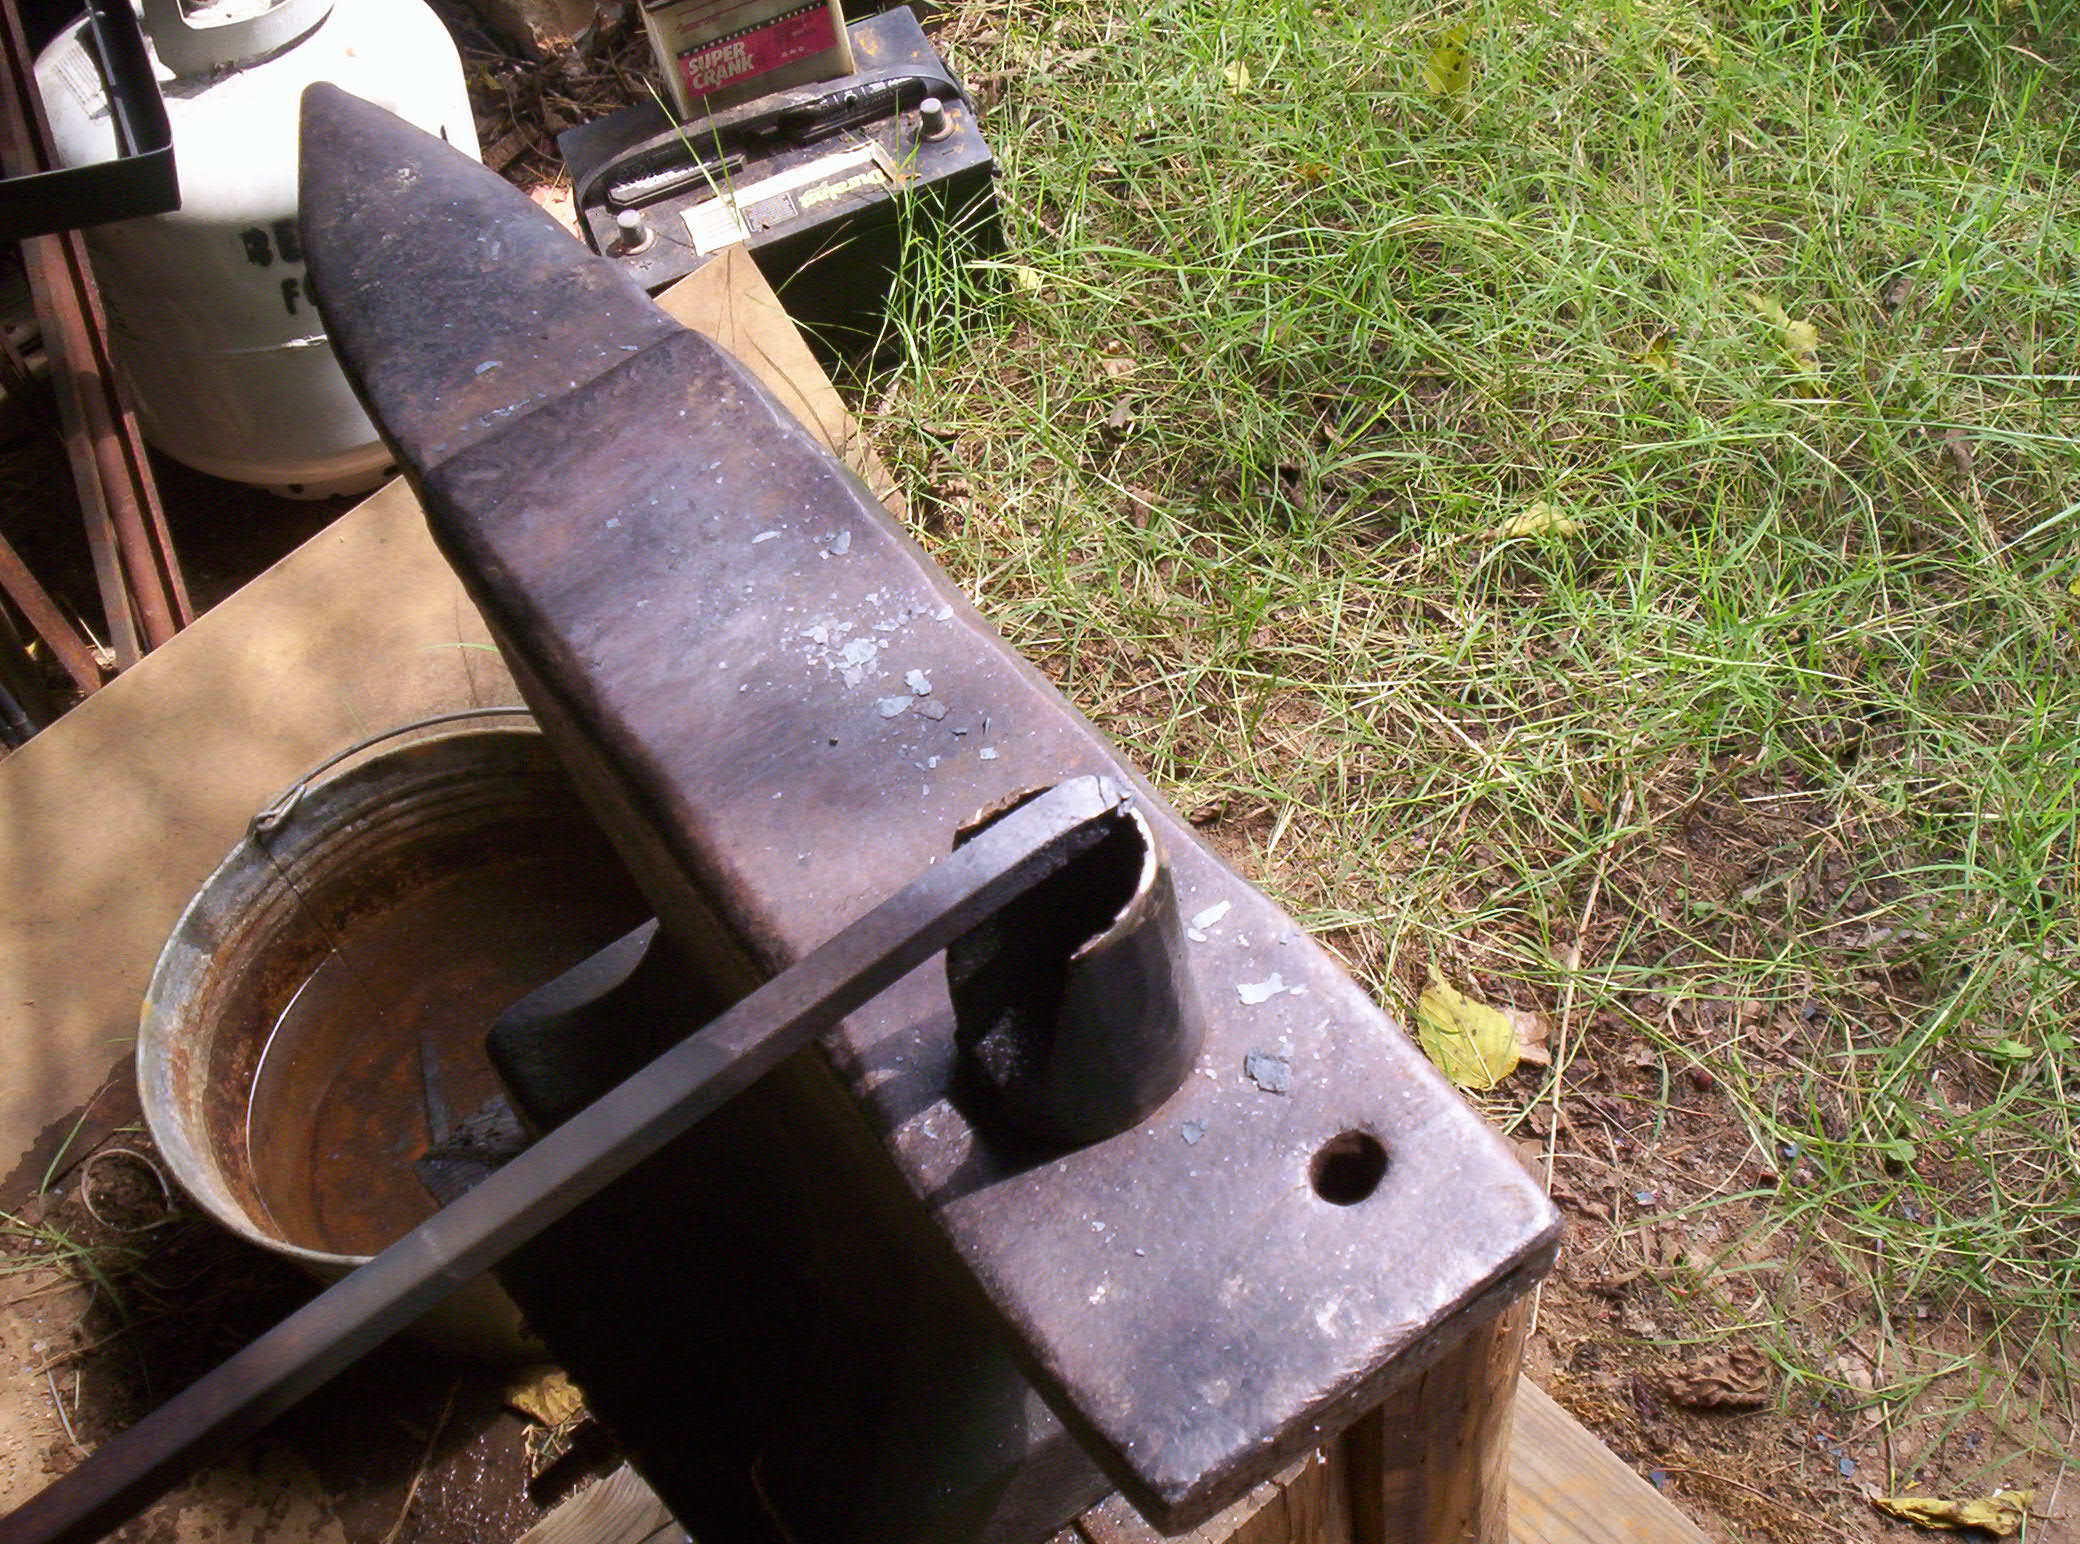
Here you can see the cut off metal. Just like making a point, I hammered on one side, turned to the next and hit again. This worked the edge of the hardie tool into the metal and squeezed the fire hook side away from the scrap side.
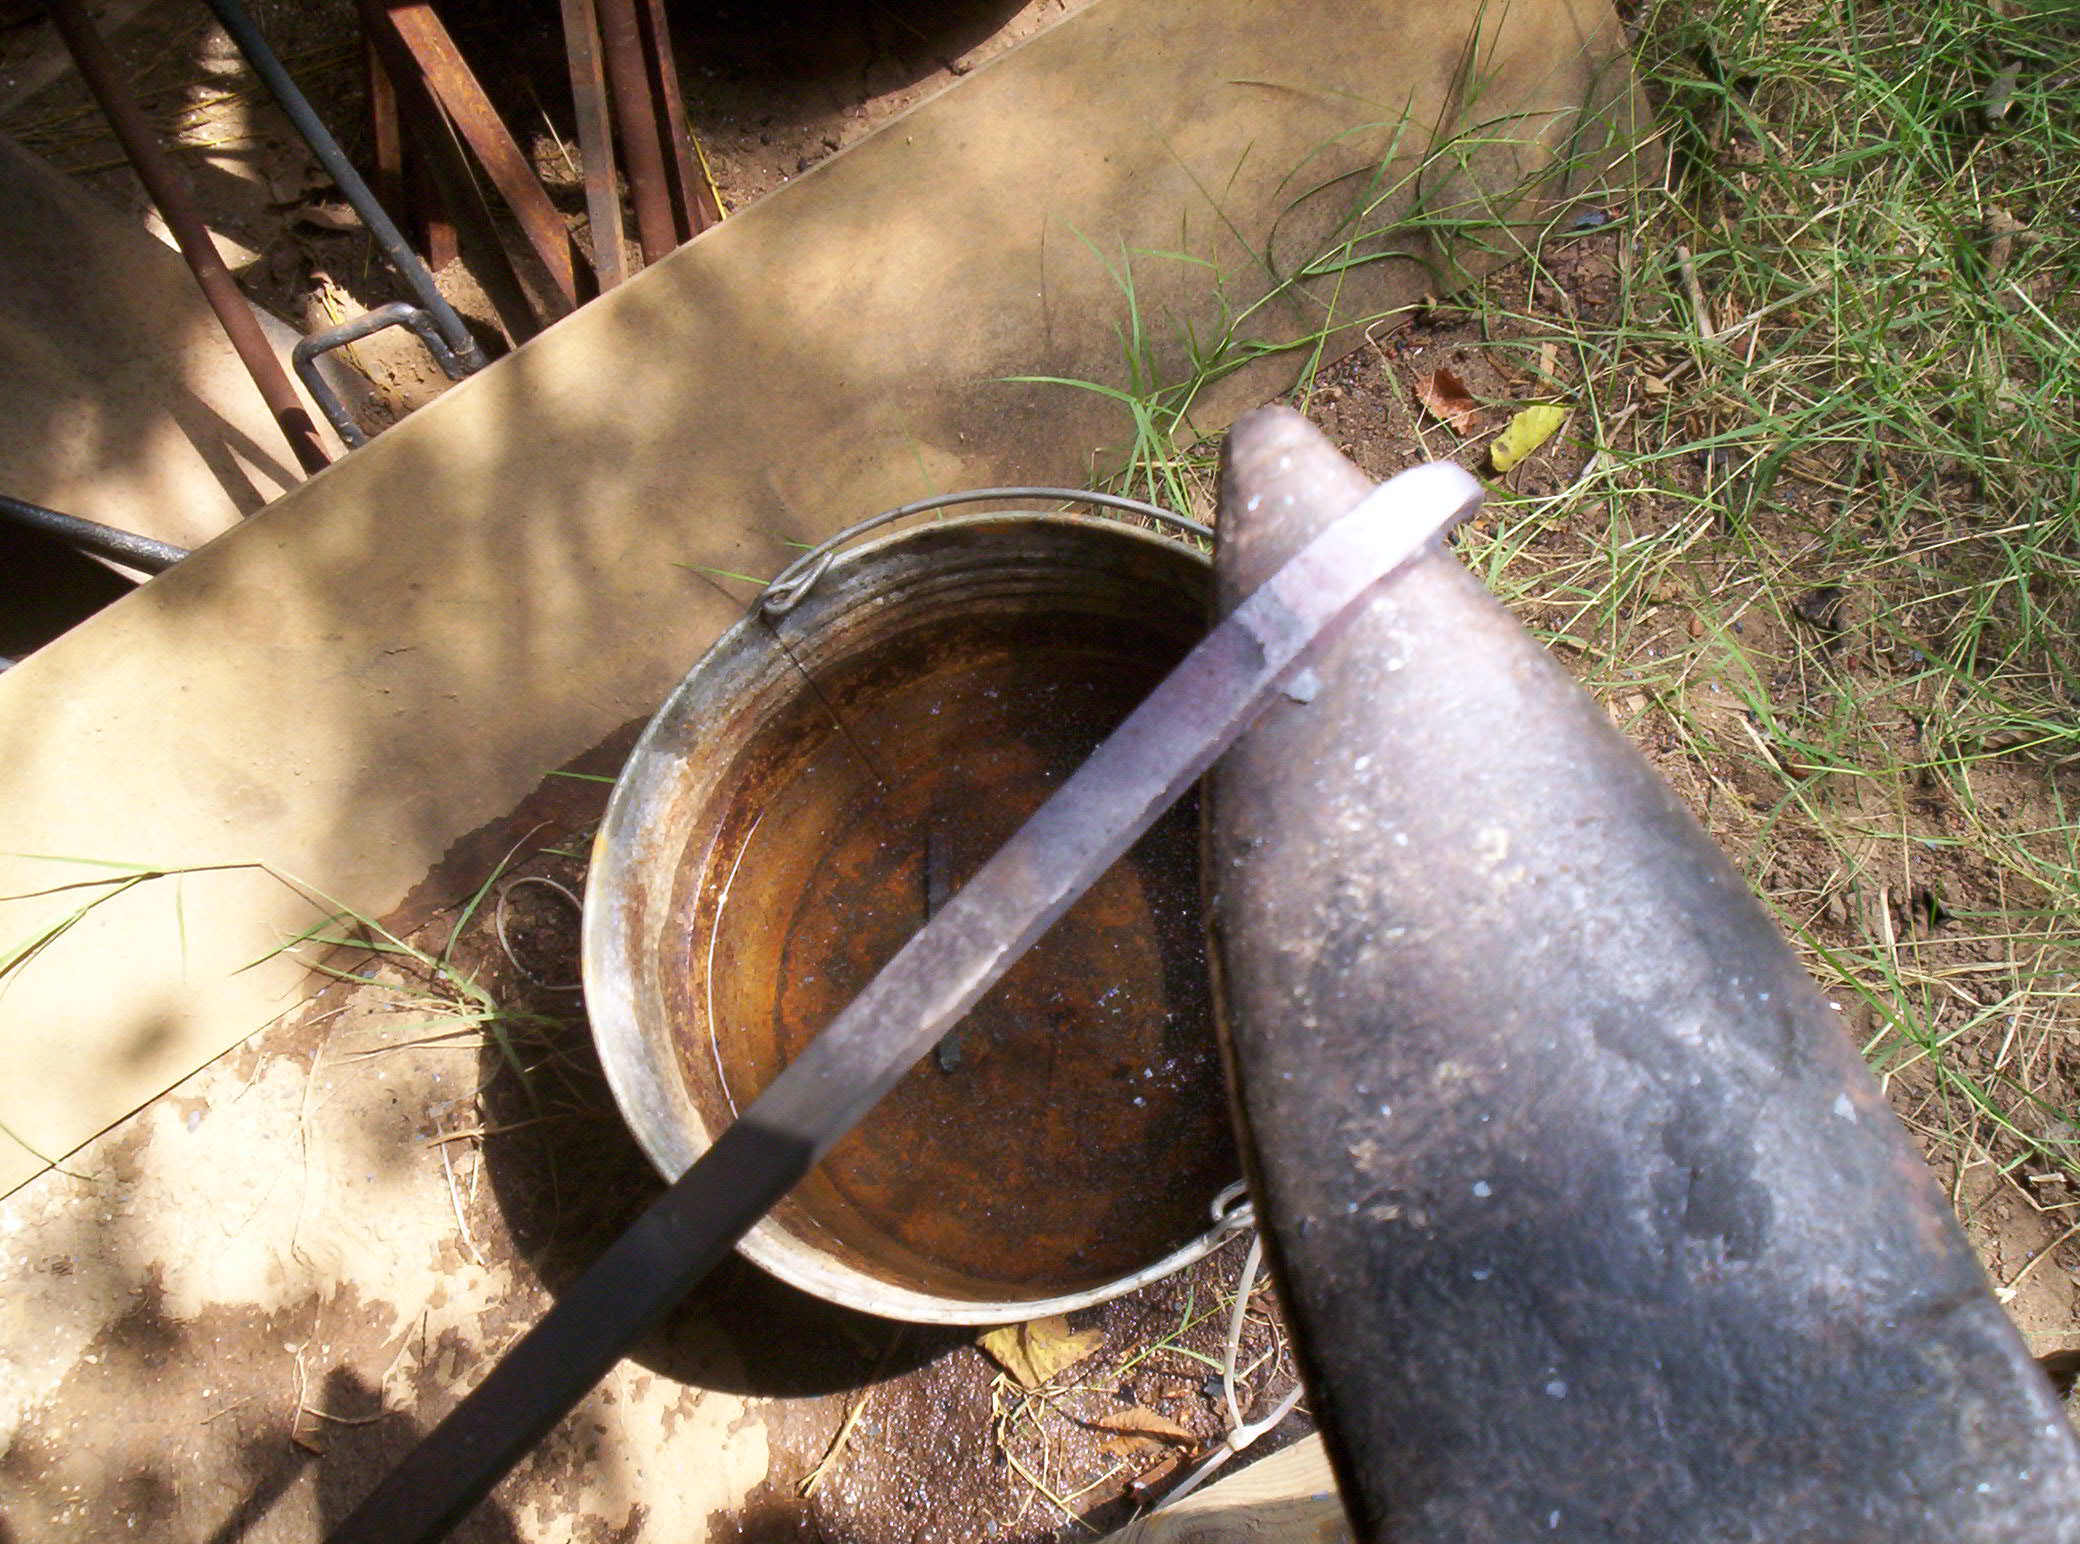
Once the cut is made I take the scrap end and drop it in the slack tub (the bucket next to the anvil in the picture) this is a bucket full of water used to quick cool a piece of metal.
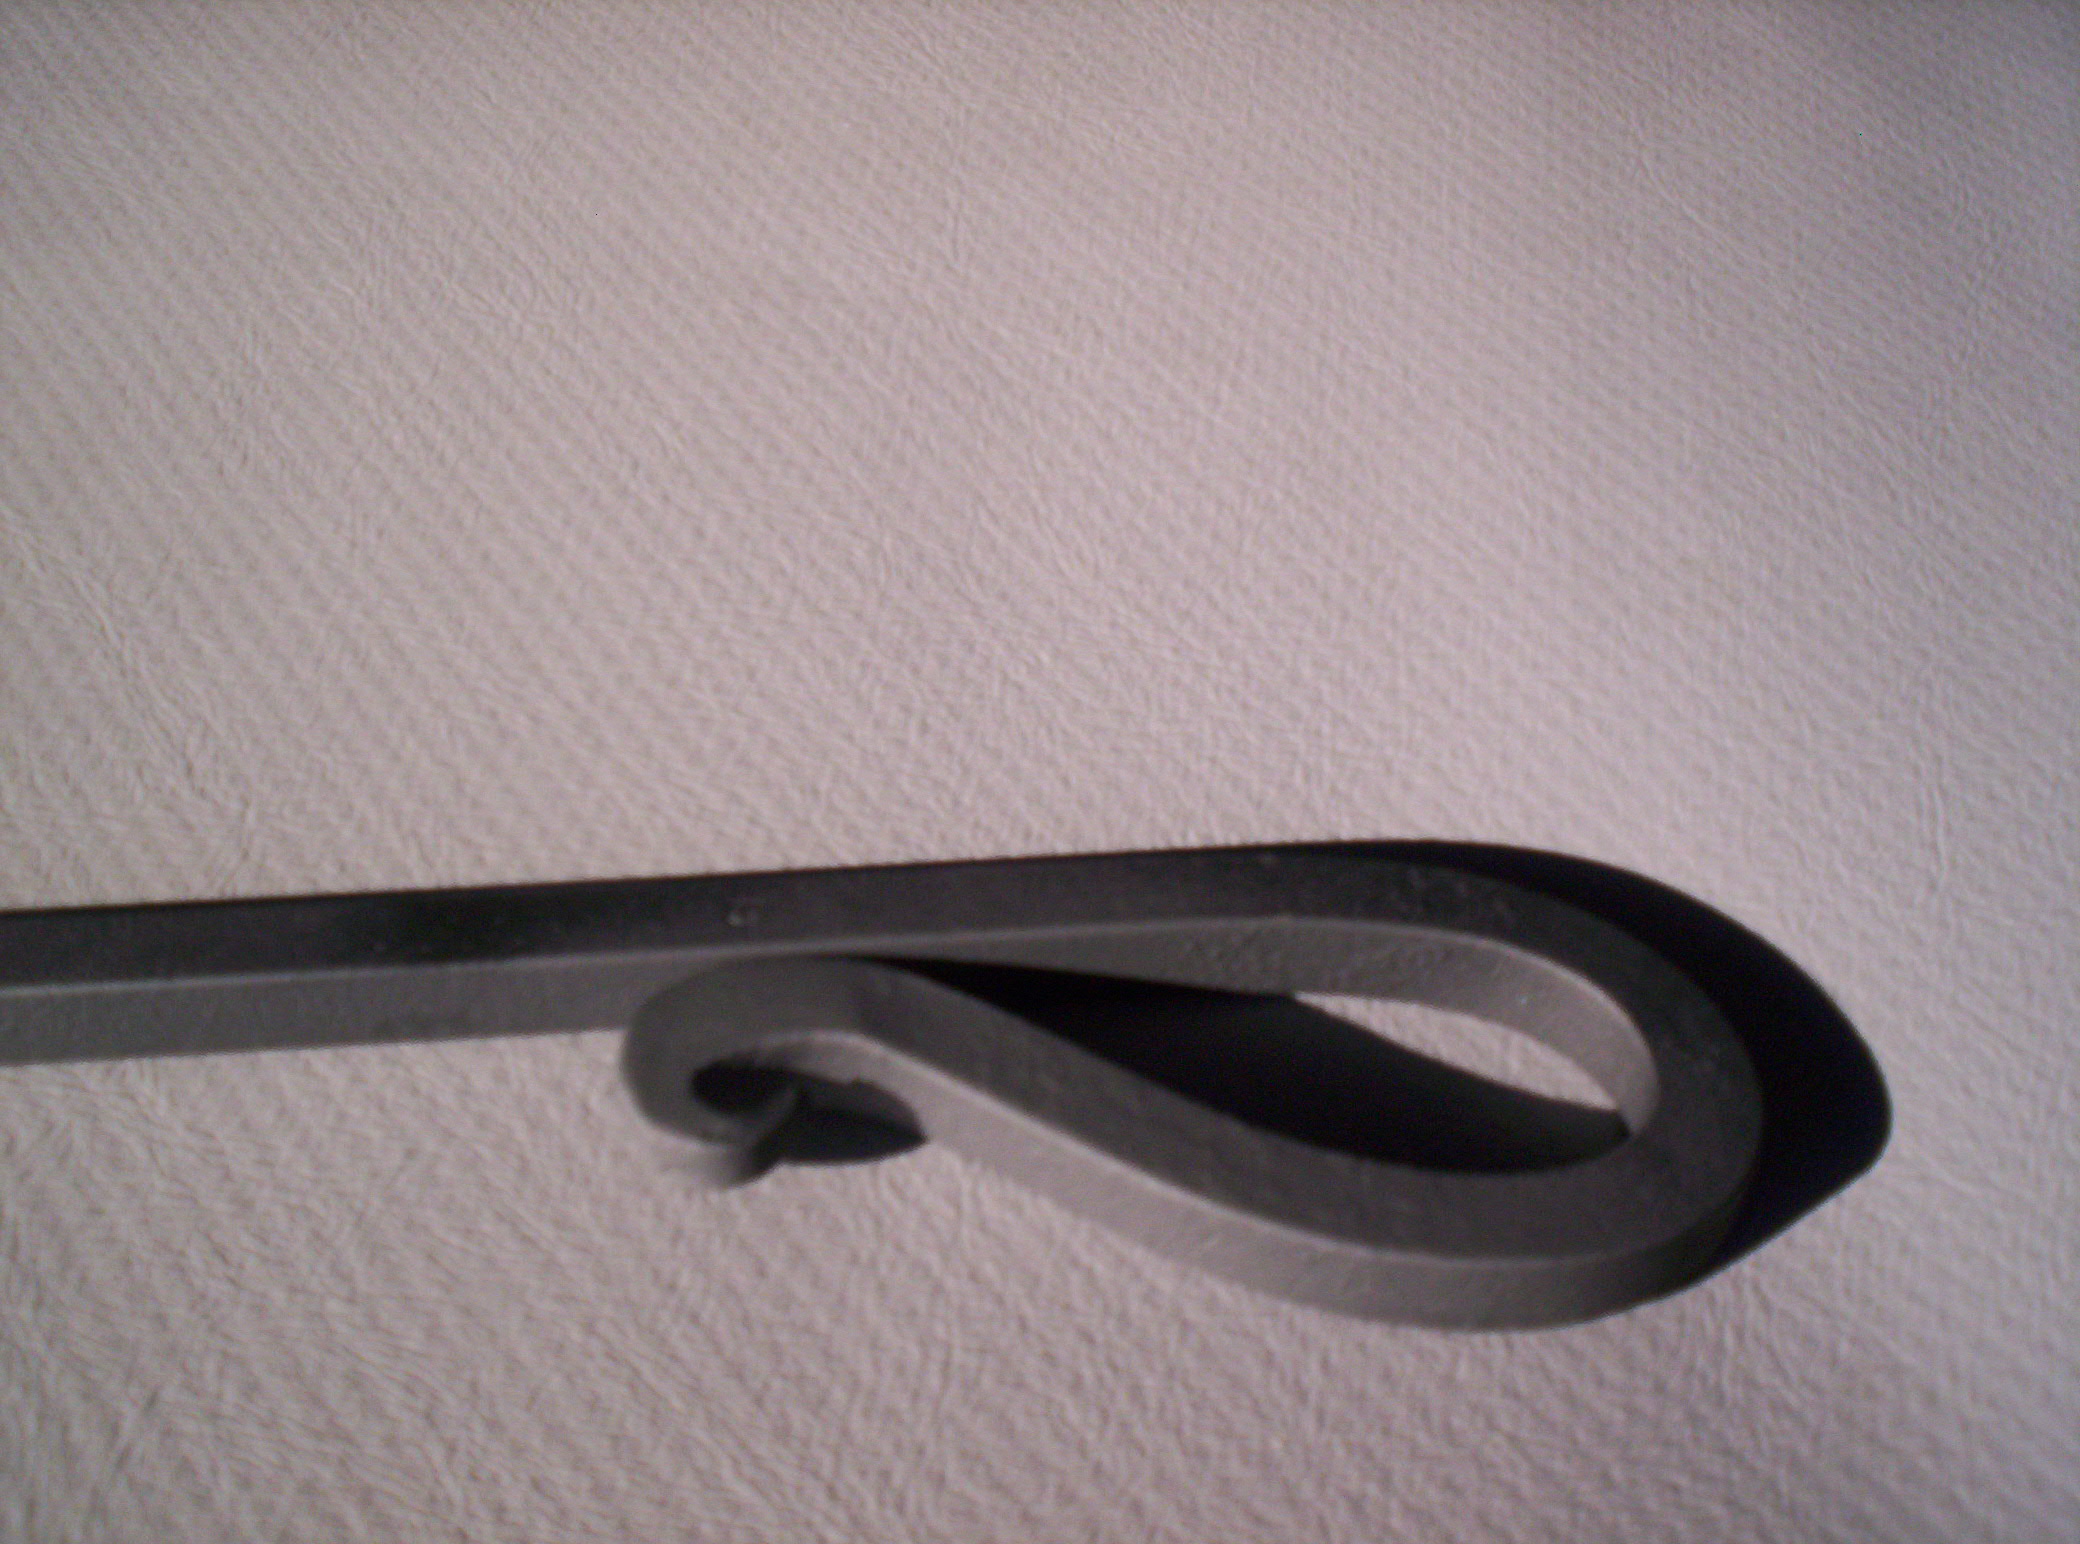
Now we make another point. This is going to become the pigtail on the handle and is designed to dress up the final project.
 After heating up the point we take the metal to the anvil and use the horn to bend it. We want a small, smooth hook shape, this step takes a few heats and we work slowly to make sure it’s just like we want it.
Here you can see the start of the pigtail. This is about as far as we need to go on the horn. We return the hook to the fire and then use a type of hammer technique called backing blows. This is different from a normal up and down motion with the hammer, instead it is basically a front to back strike, hitting the far side of the bend so the metal curls up towards the main part of the shaft.
Once we have the pigtail made, we place the handle end back into the fire. Once the part of the handle area that is going to be bent is very hot we place it in a vise and gently arc the handle to the shape to form the grip part of the handle. The bending is aided with a few gentle hammer blows and is measured and shaped out all by eye.
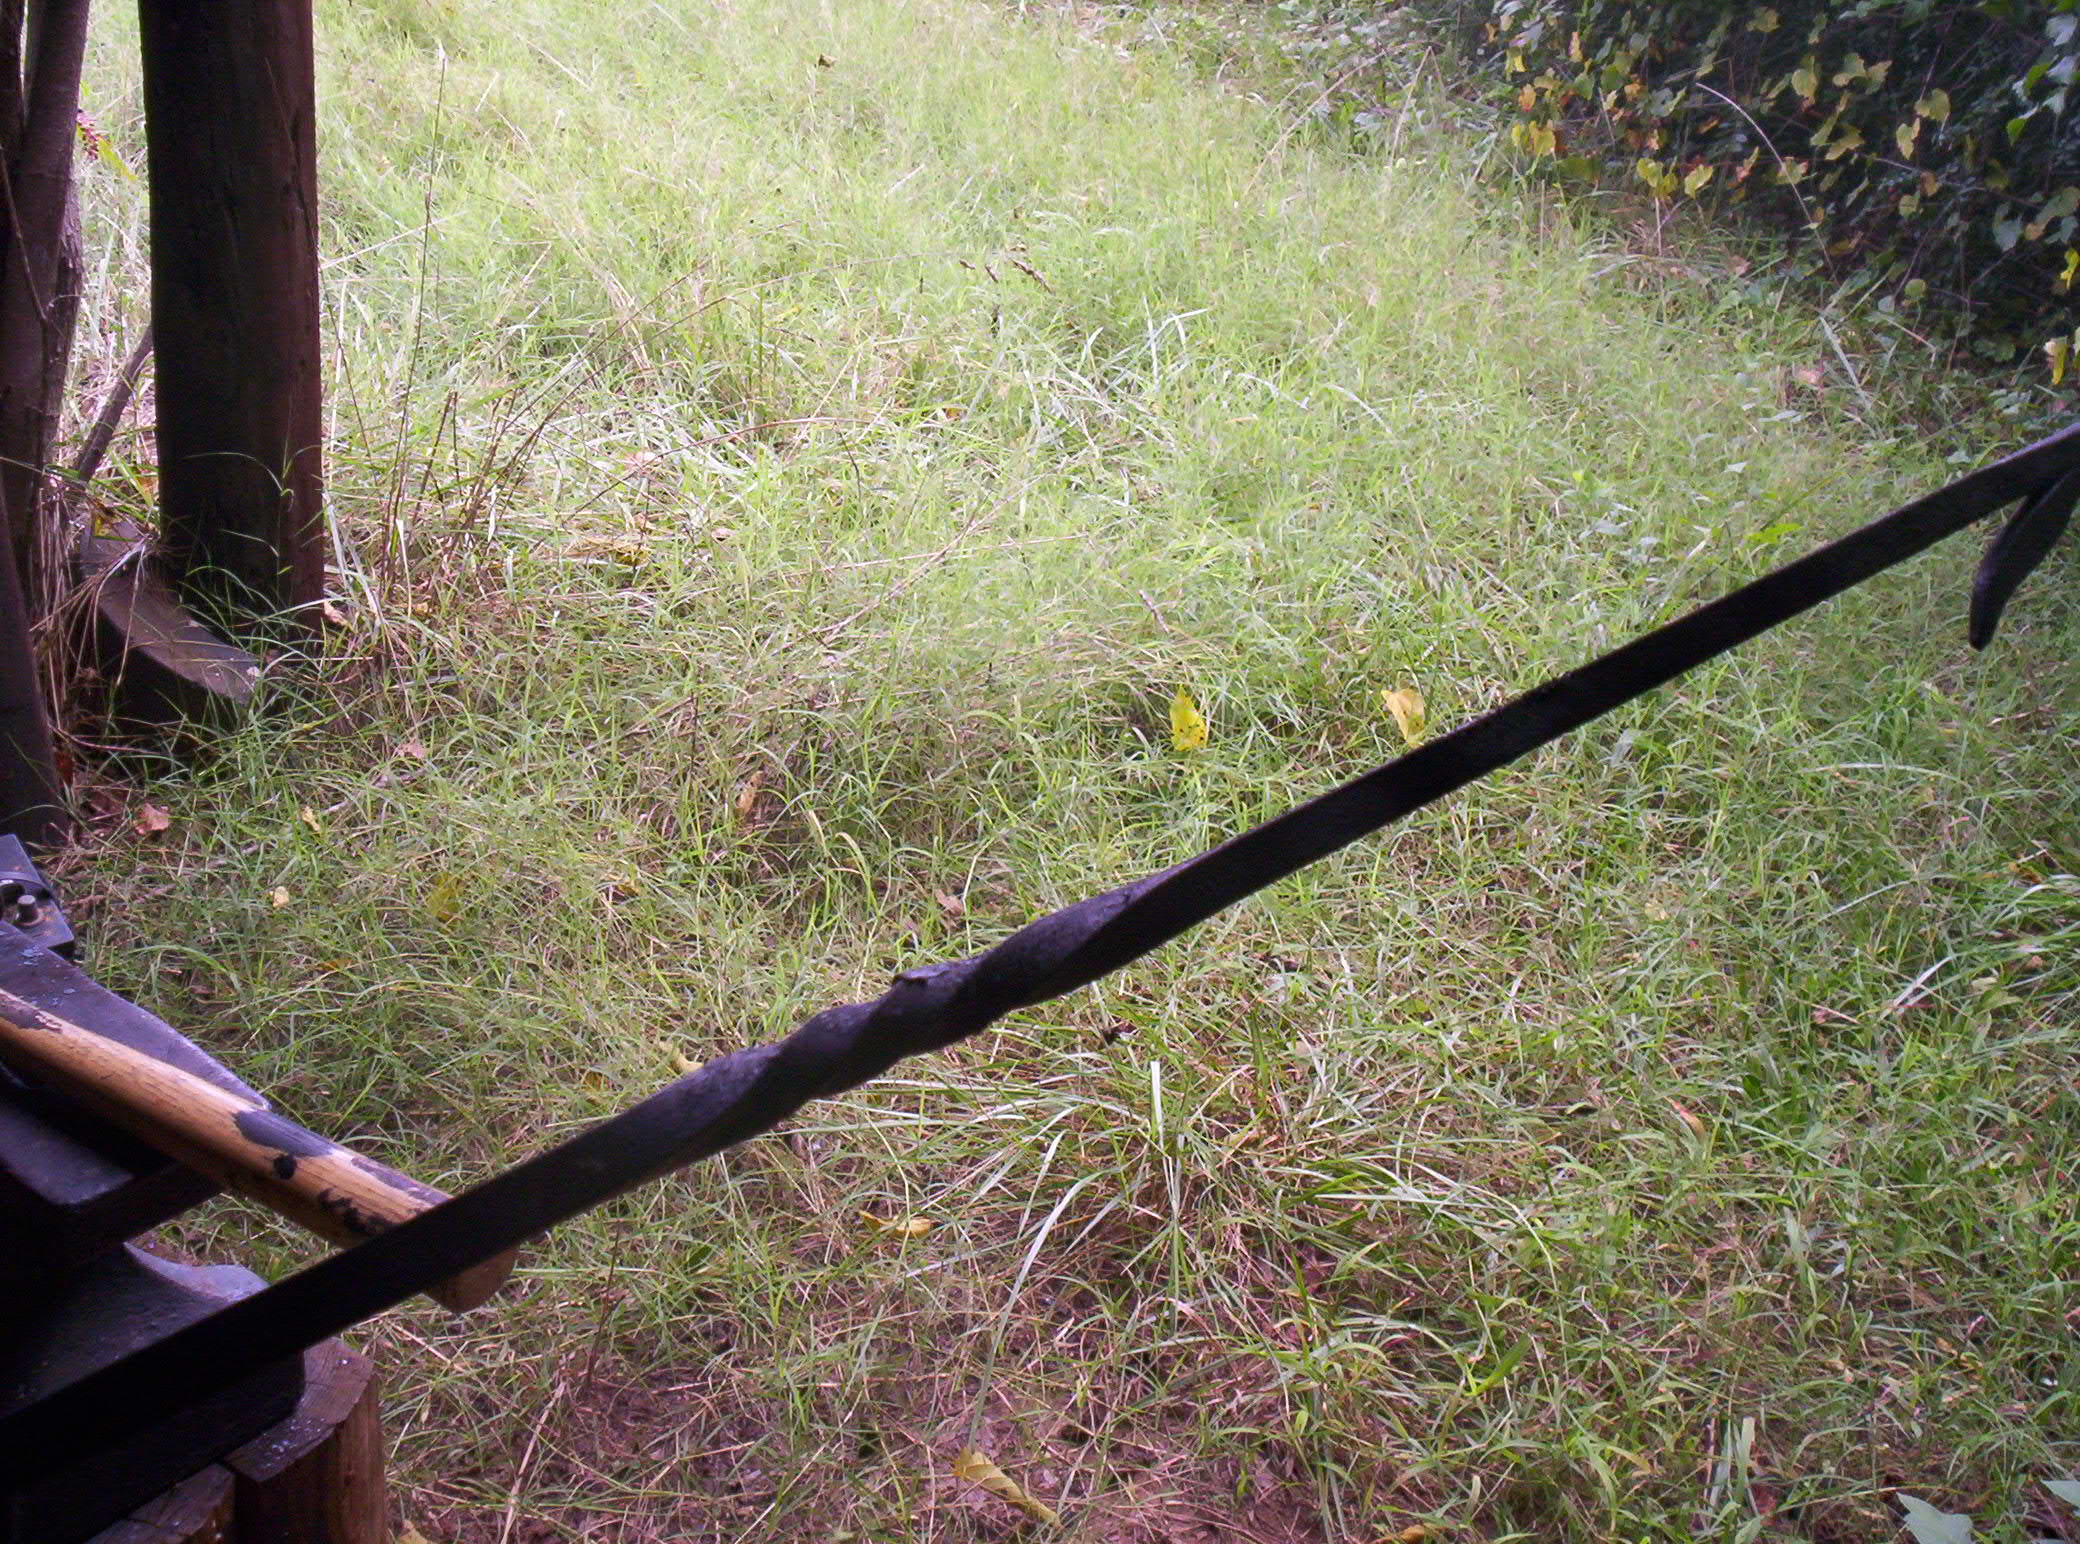
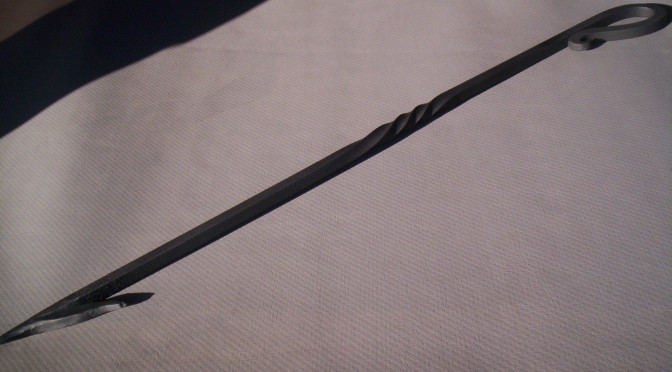
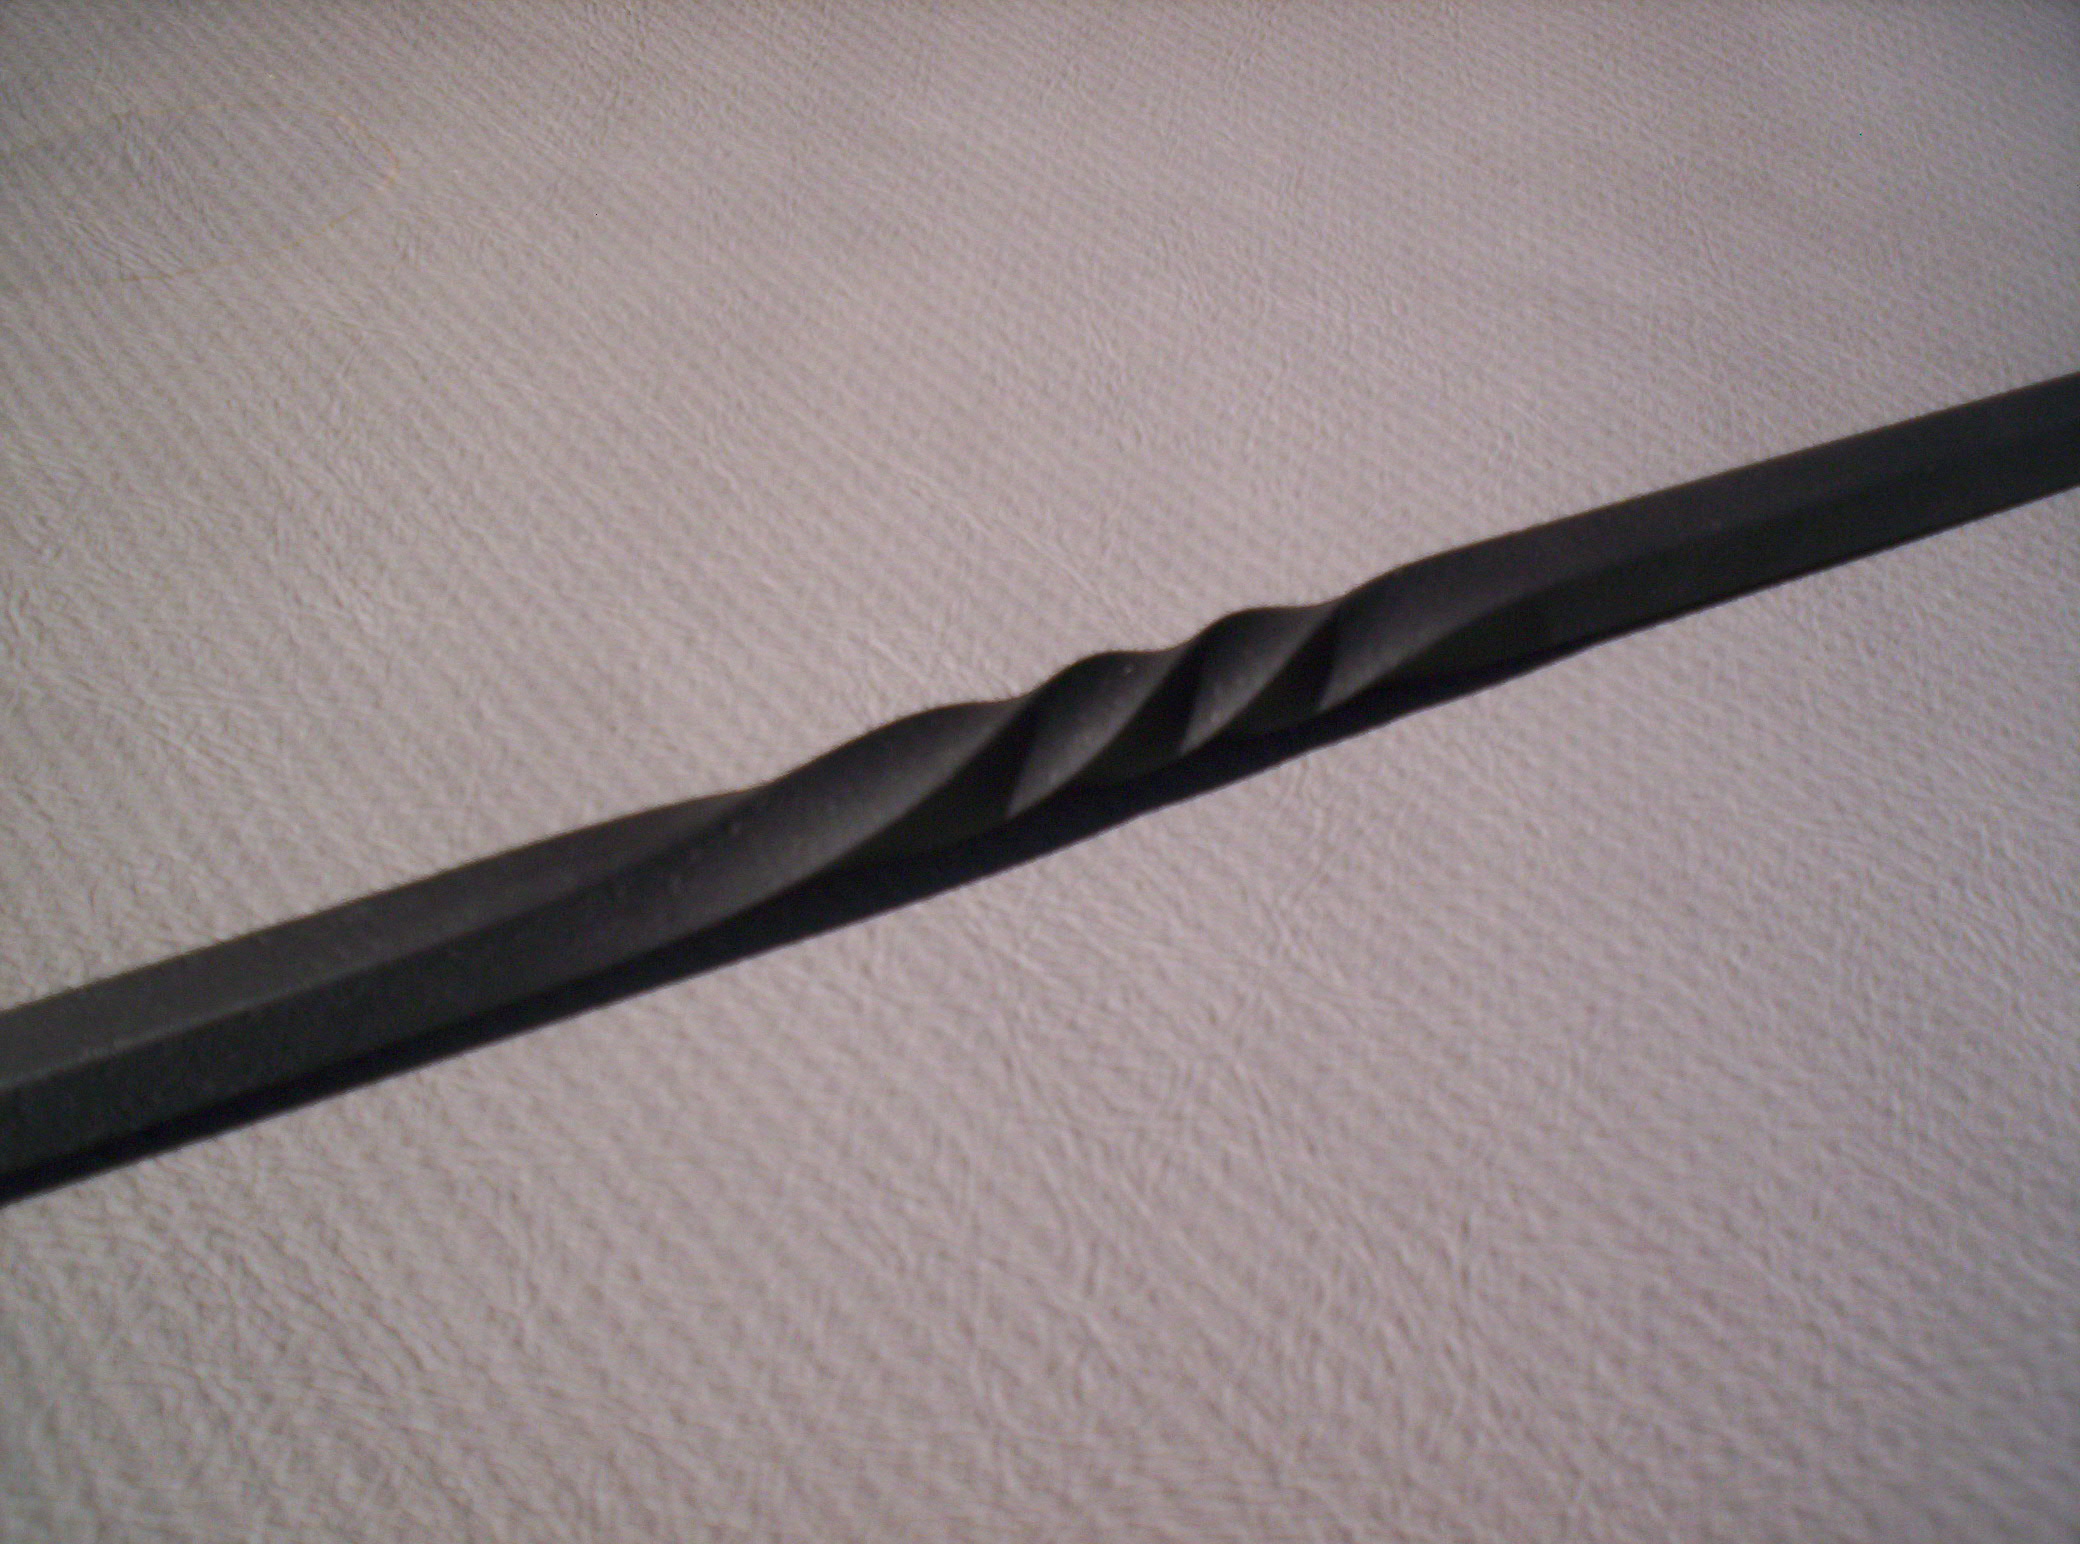
Now we have the basic fire hook. I felt like it needed a little more flair. So I placed the center of the shaft in the fire and got it quite hot. Then took a pair of tongs and a set of vise-grips and twisted the metal. This is a simple touch, but I really liked the way it came out.
The last hot metal step is to place a touch mark. This is a stamp that shows who made the piece, kind of like a signature on a painting. I use the letter G and placed it on the shaft right next to the handle.
Now we need to brush off any left over coal or burned steel from the piece. We use a wire brush and just scrape it over the metal. This will make the metal a little shiny but doesn’t finish off the project.
As the metal is cooling down we need decide how to protect it from rusting away. I could use a wax or oil, but this hook will go into fires and the wax might melt off or the oil might burn off I need to use something else. To make the hook easy to care for I choose to cover it with some spray paint. I used flat black and gave a good coat over the whole piece. This way if the paint is damaged through use it can be touched up very easily by the owner – by just adding more spray paint where needed.
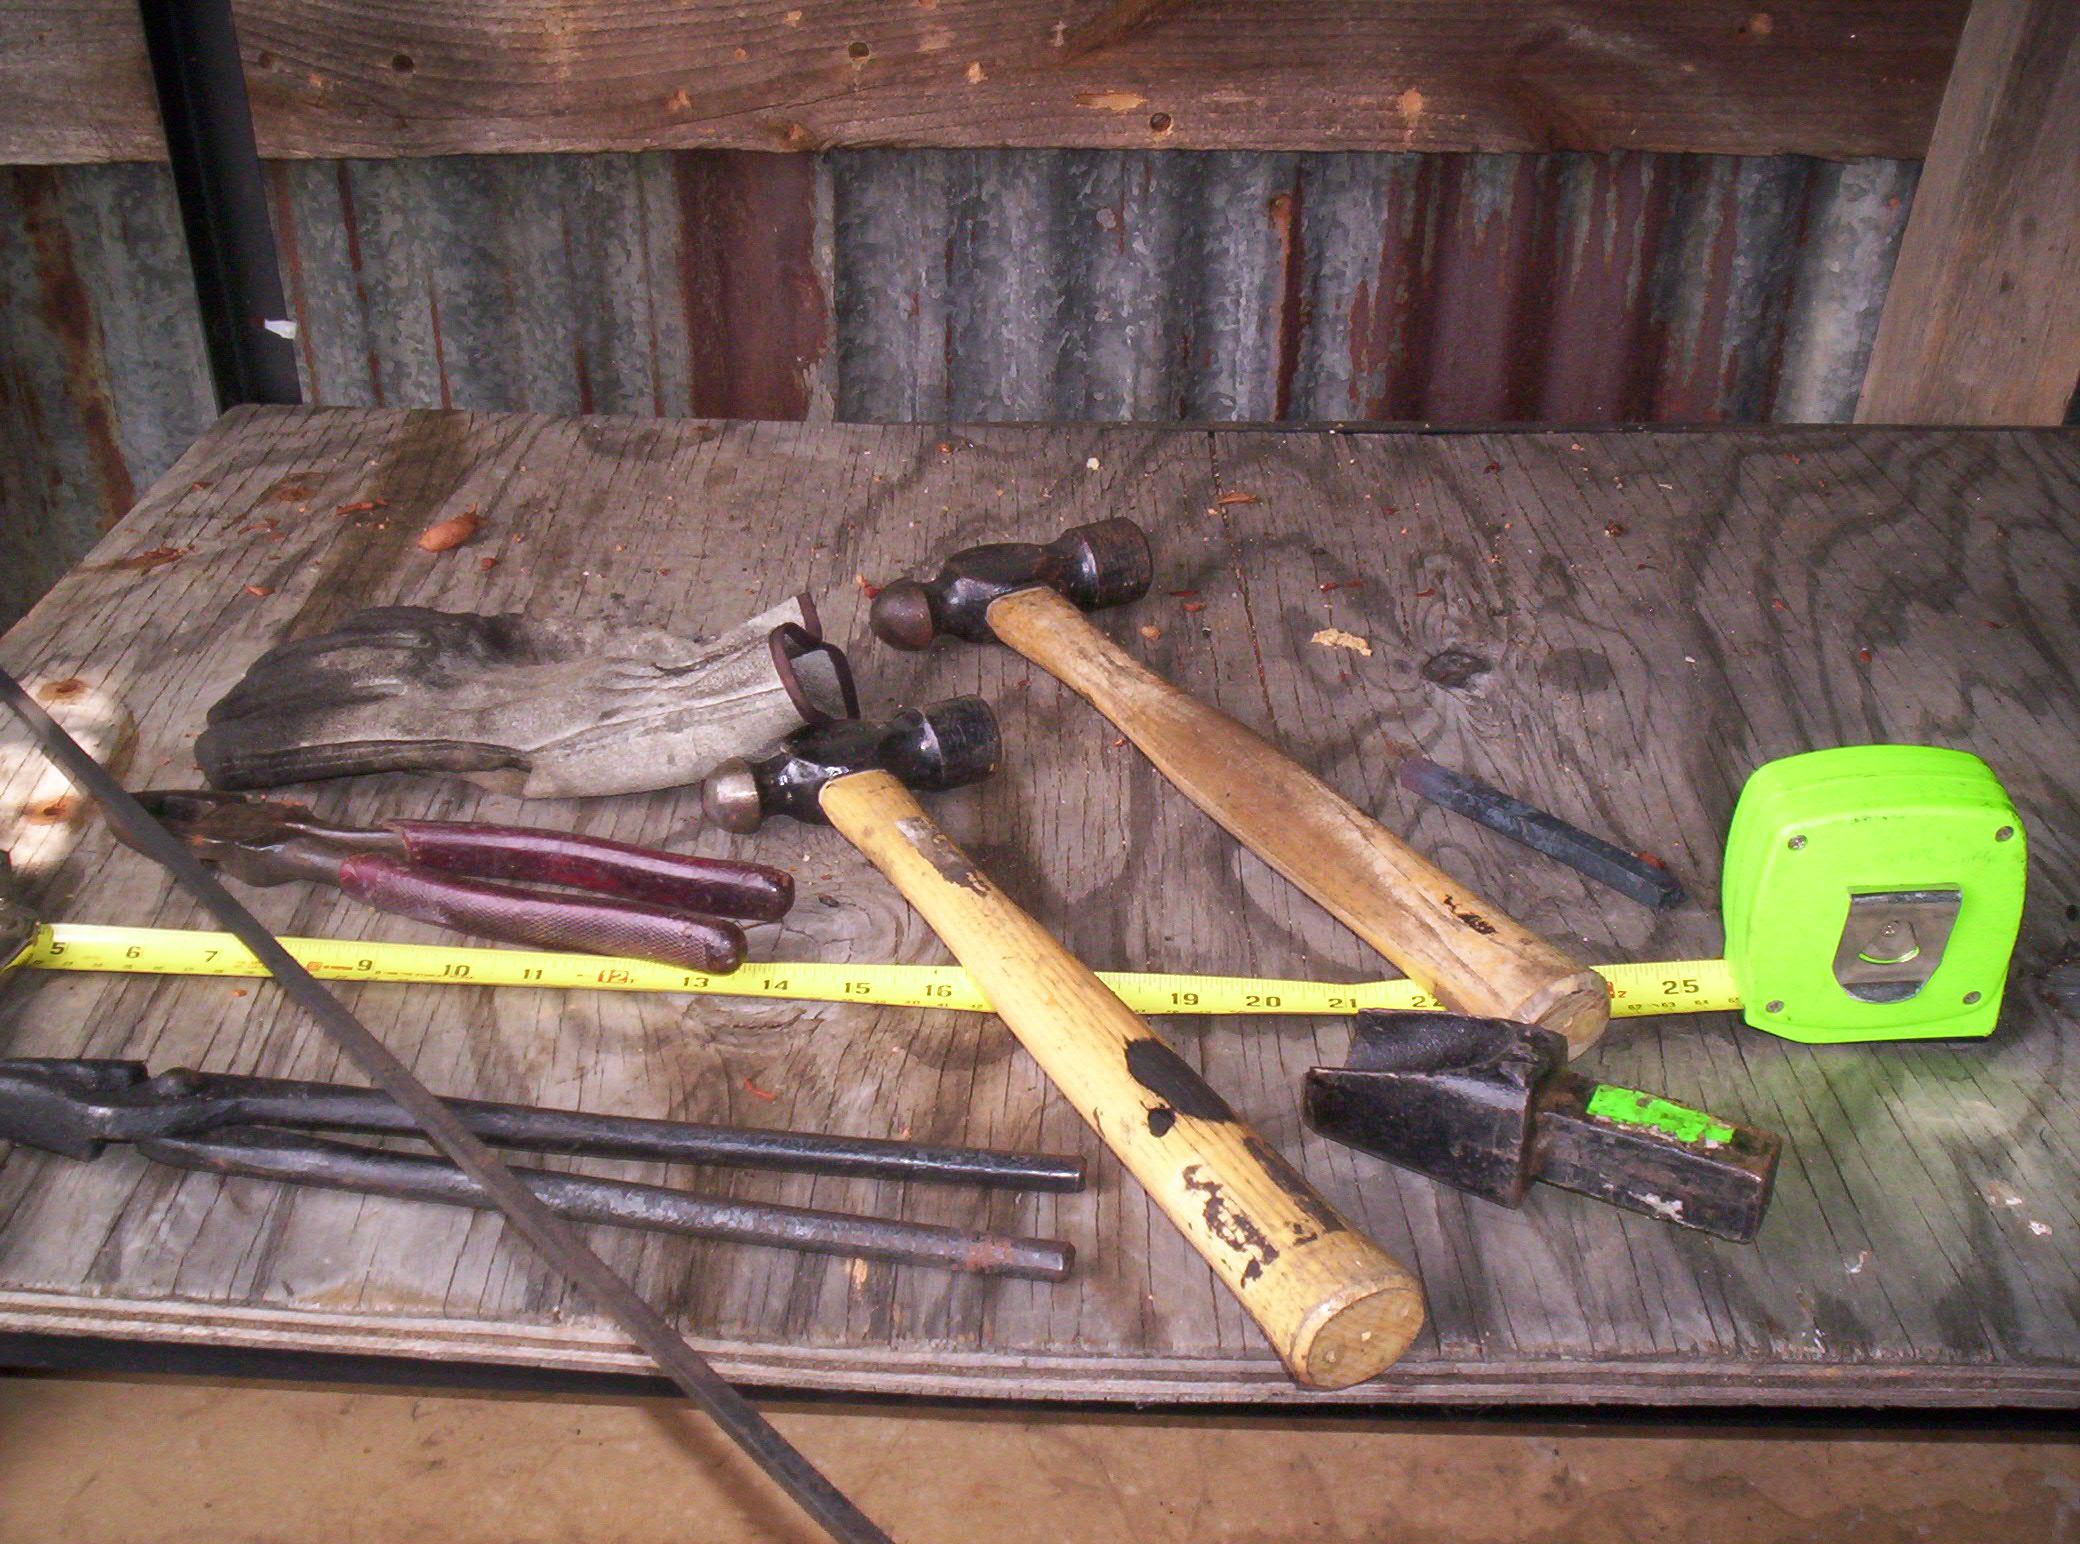
Here is an overview of the various tools I used. On the left there are two tongs. This long handled tools look like pliers but aren’t – they are used to reach into the fire to remove metal.
Over the top is a narrow metal shaft, this is part of a small fire rake I use to move the burning coal around in the forge.
Next is a tape measure, I need this to make sure the stock is the right length.
Over the top is one of my gloves. This is a leather glove that is really only used to give me time to get my hand away from something hot – they burn, just slower than my fingers.
I have two hammers here, one is slightly heavier than the other and was used while forge-welding. The heavier the hammer the more force is applied (and thus the faster the work).. I tend to use the smaller 8 ounce hammer for most of my work.
You can also see the hardie-tool and then the bit of scrap metal on the table.
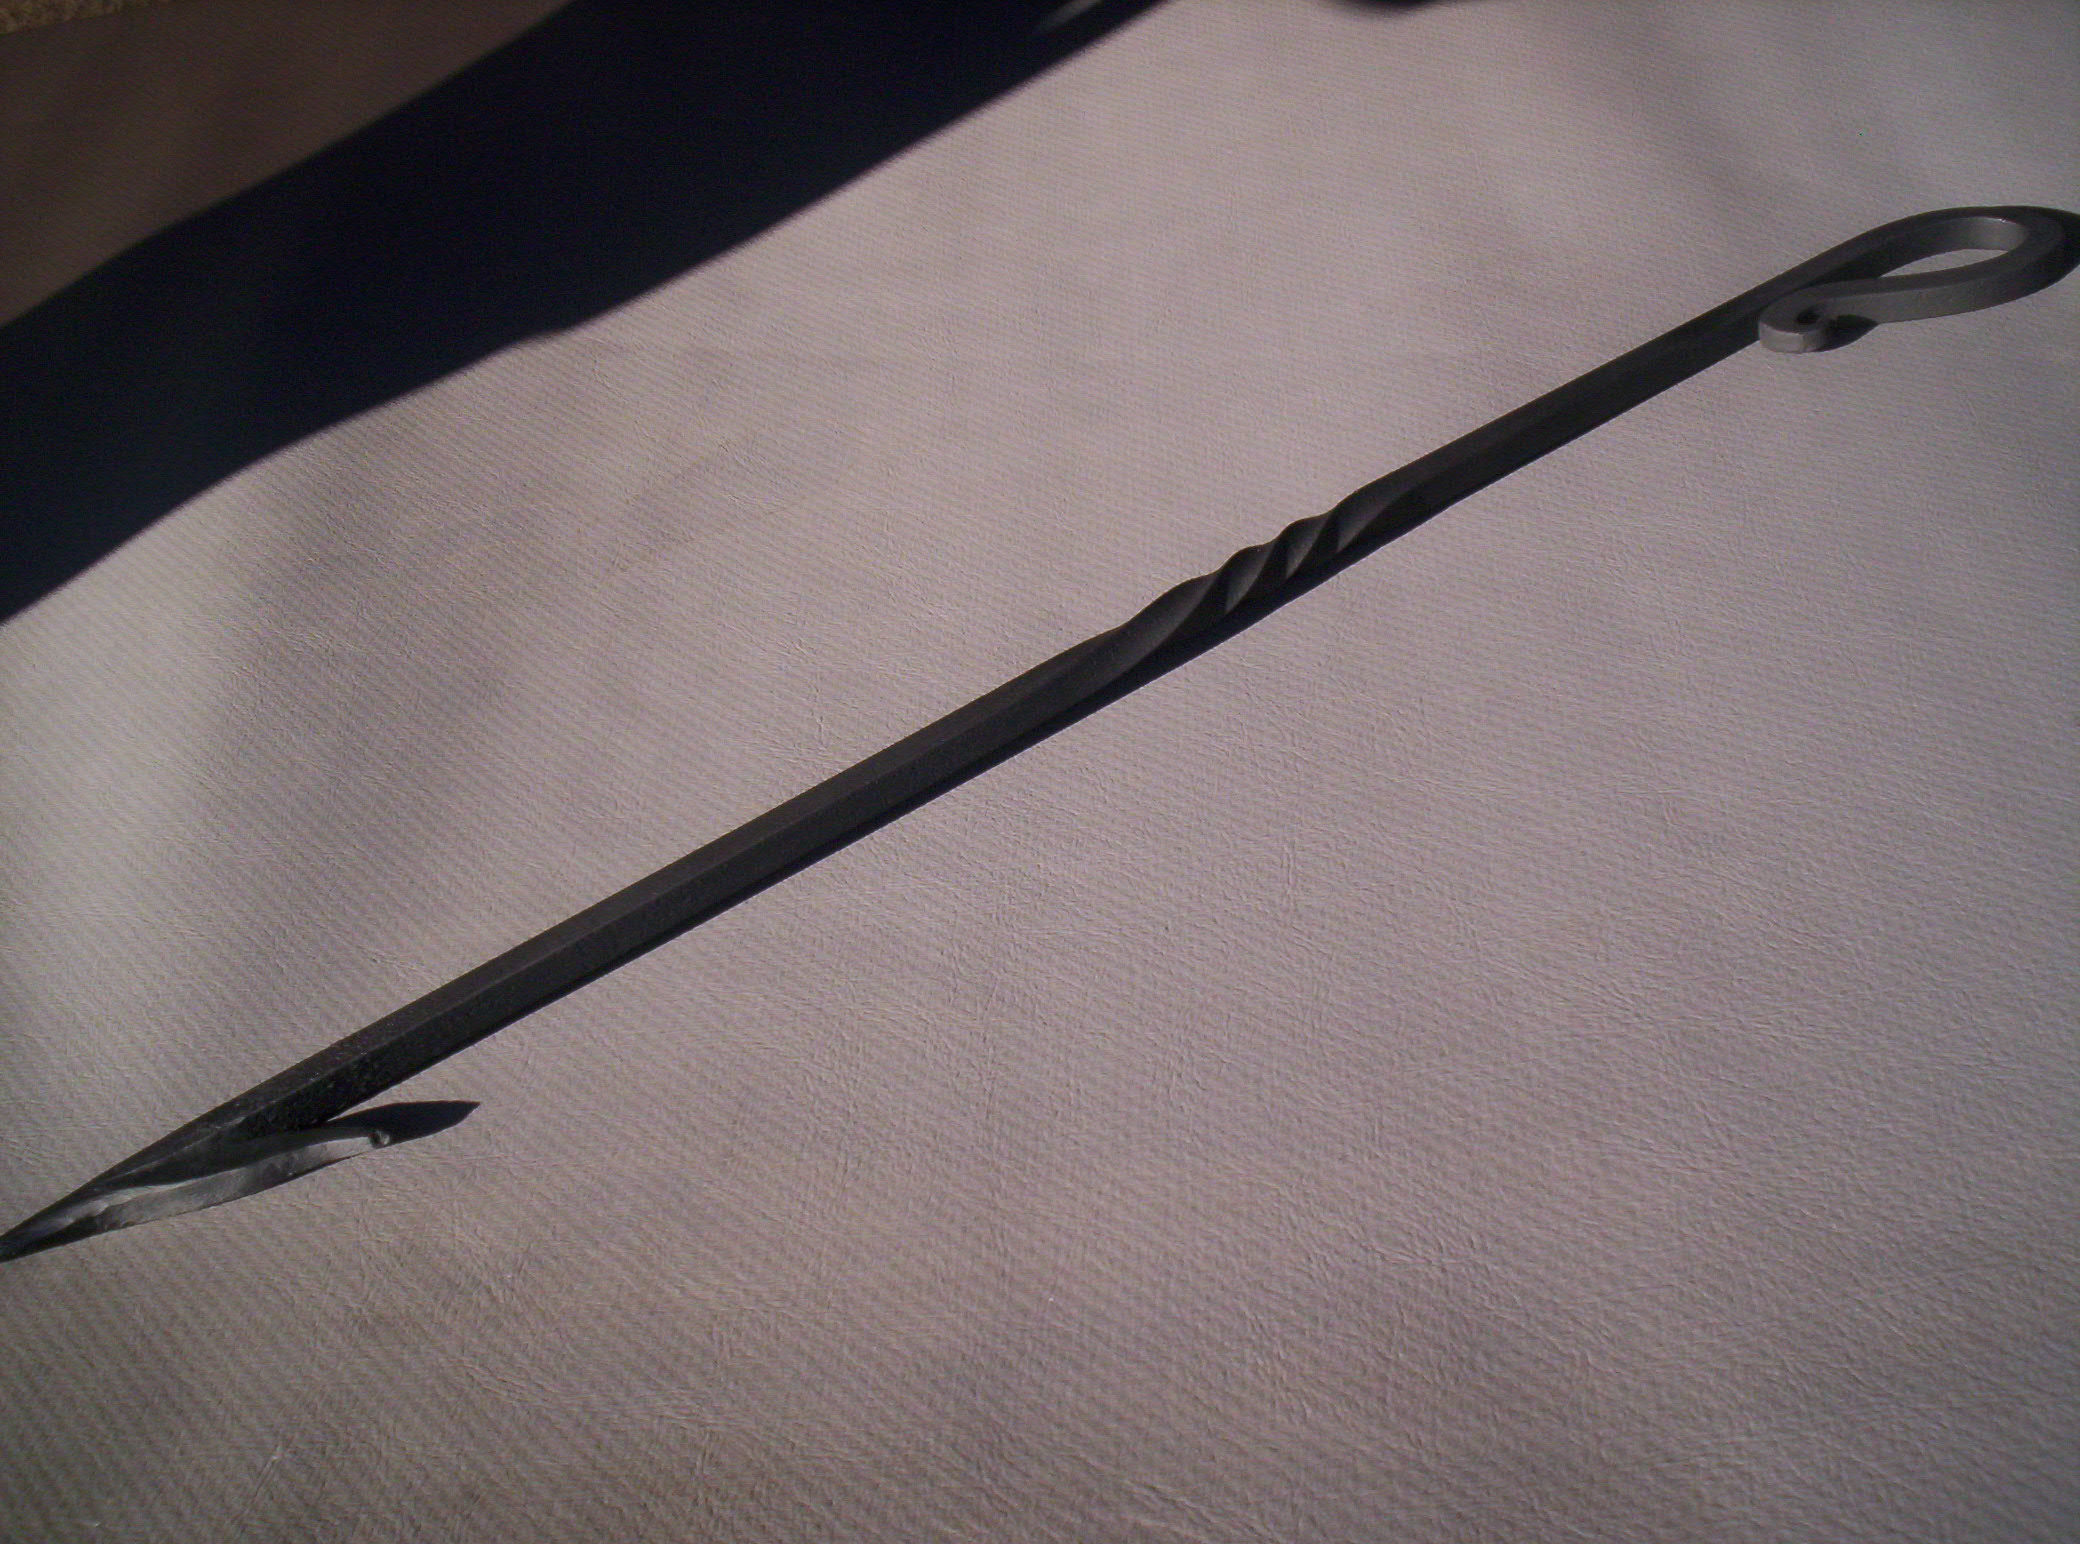
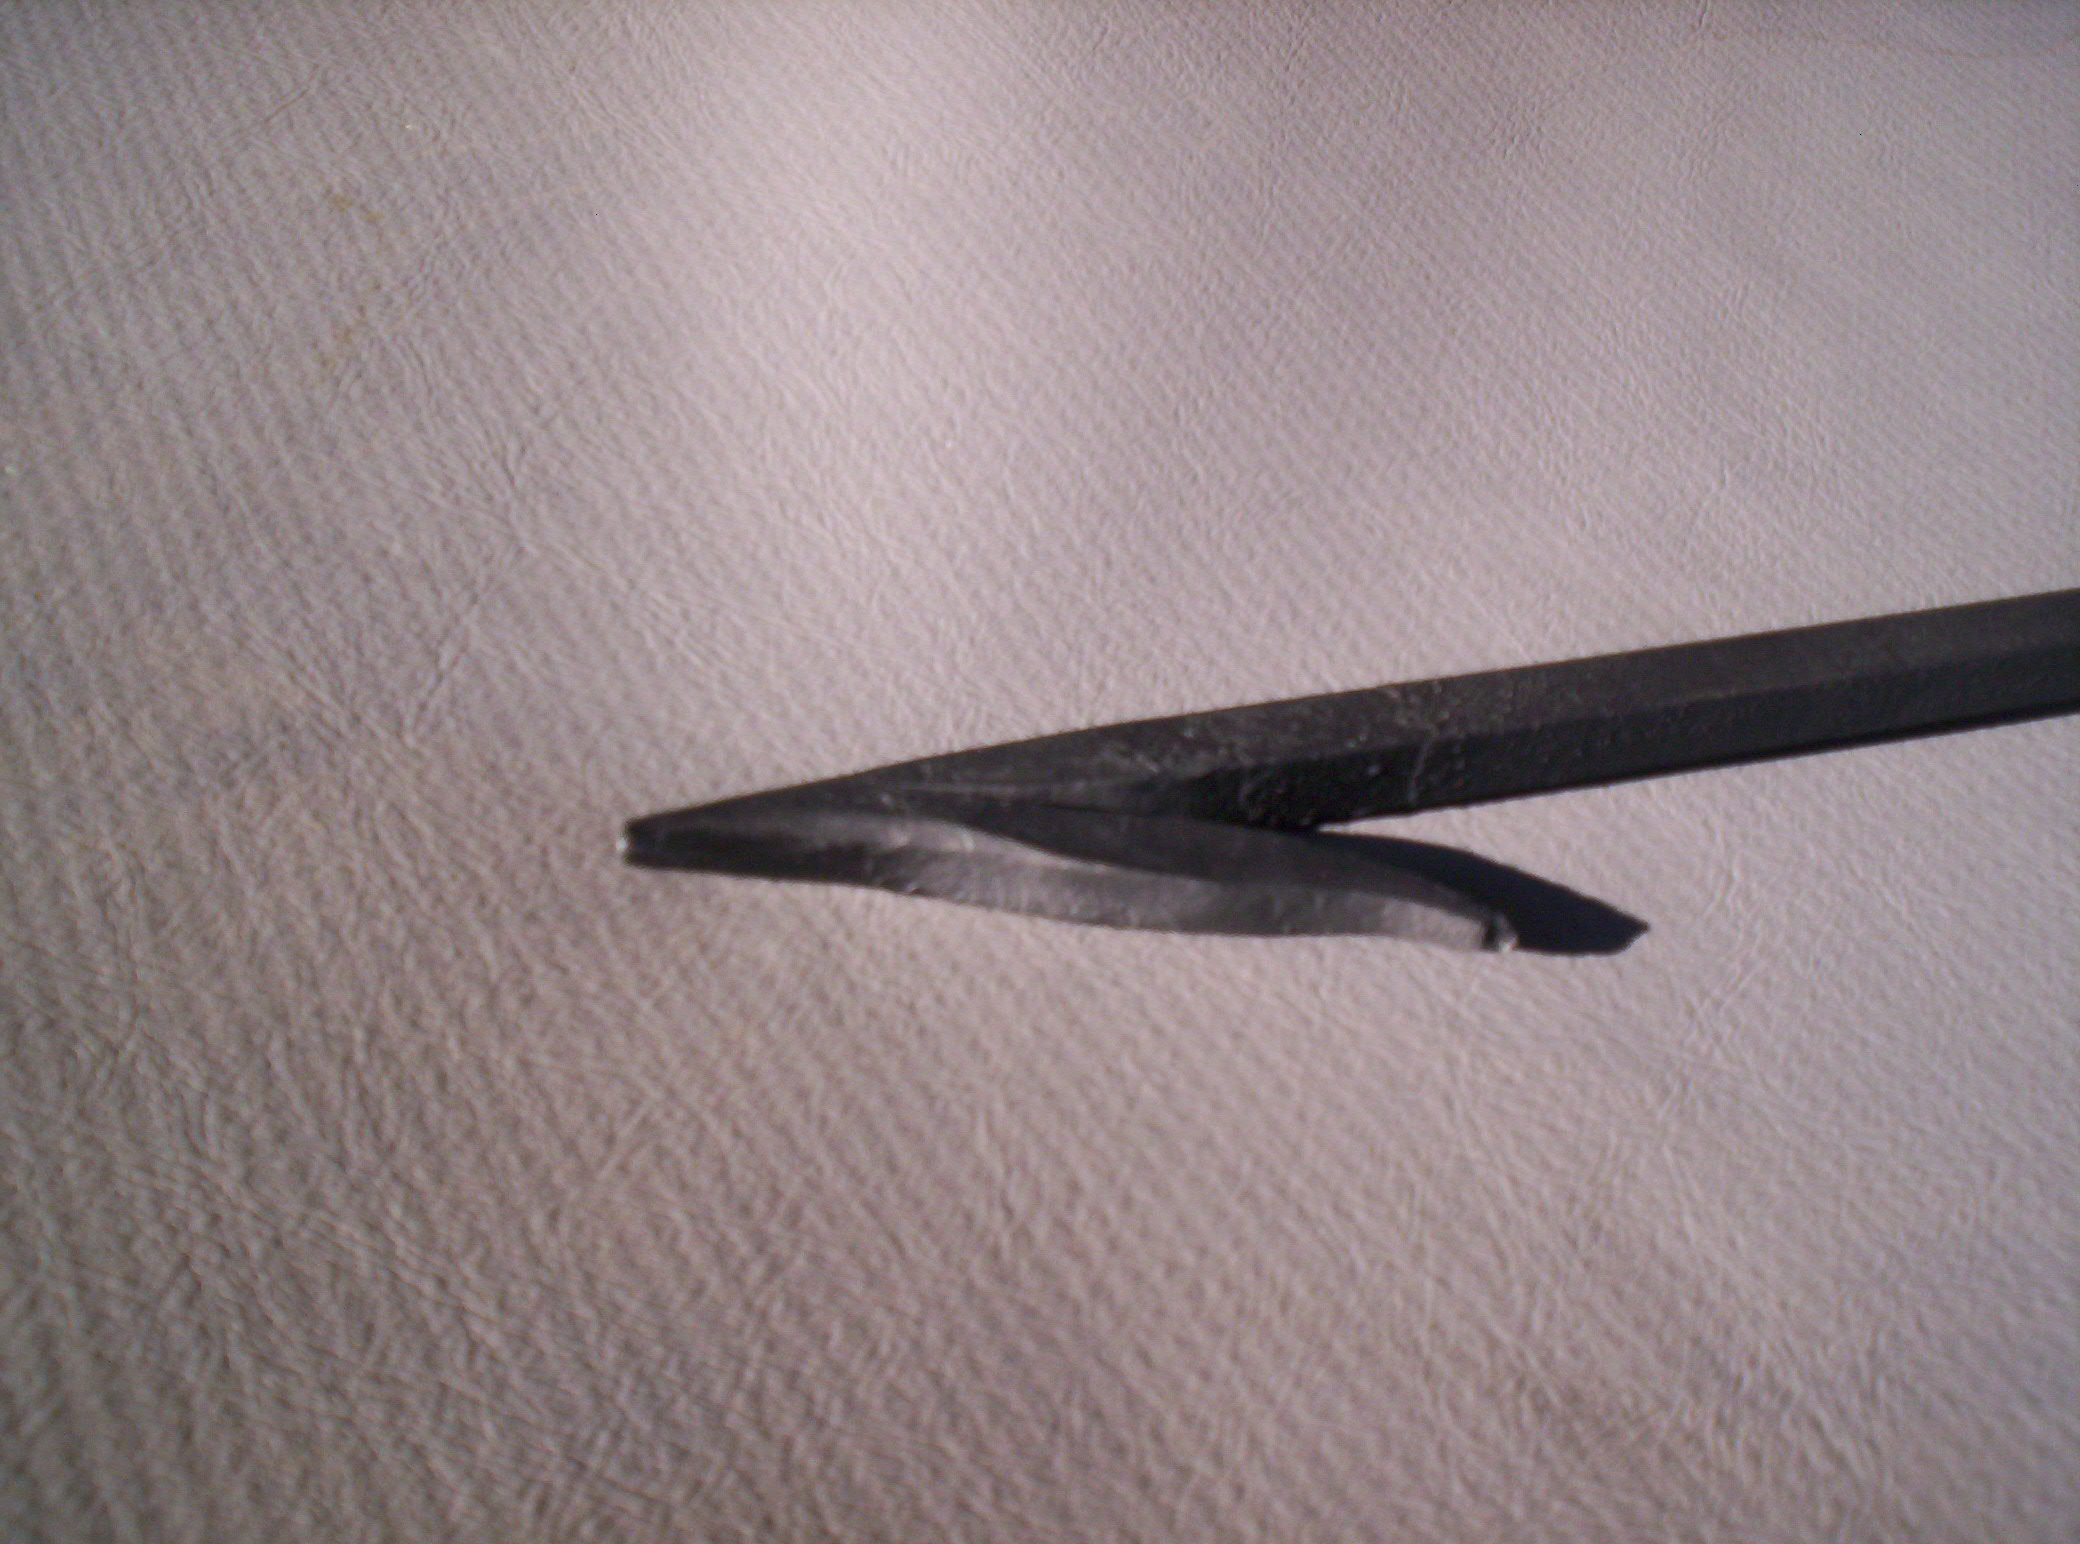
Here are some close ups of the finished fire hook.
Researching ways to improve scientist’s access to data. Programming software to solve humanity’s problems. Disseminating emergency preparedness knowledge. Sharing knowledge about science. Practicing amateur radio. Serving humanity through volunteer efforts. Drives a robot to work.